A Beginner’s Guide To Badminton Techniques (Technique Guide)
Every stylish player you watch at your local hall in Malaysia started in the same place: a grip that felt odd, a serve that clipped the tape, and clears that landed half court. Technique is not talent. It is a short list of basics learned in the right order, and this guide walks through them one at a time: the grip, the ready position, the serve, the clear, the drop shot, the net shot and the first footwork patterns. Learn these seven pieces properly and the rest of badminton gets much easier, because every advanced shot is built on top of them.
Technique Check #1
The Grip and Ready Position Come First
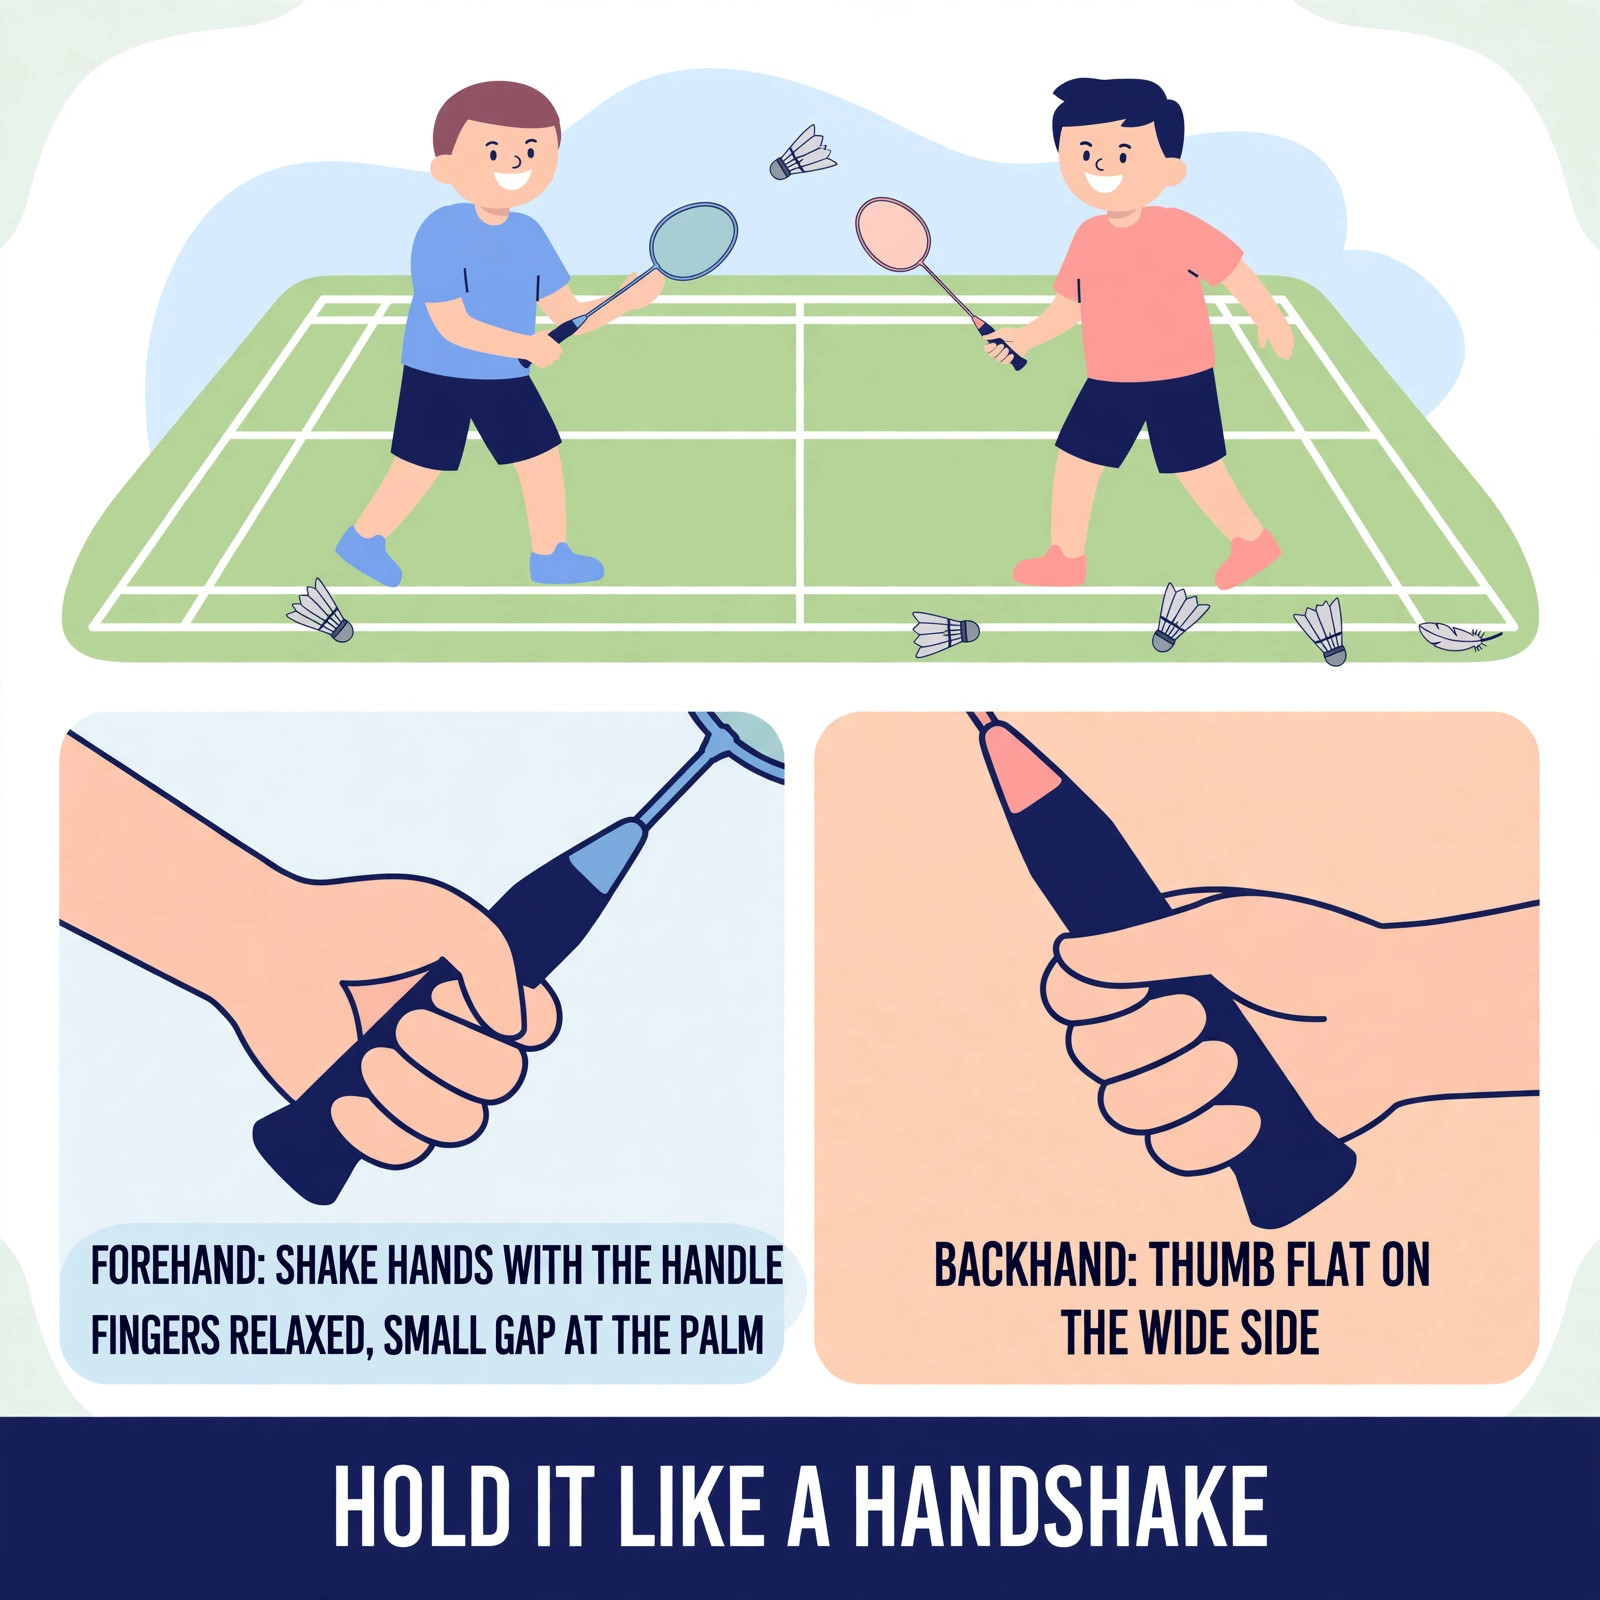
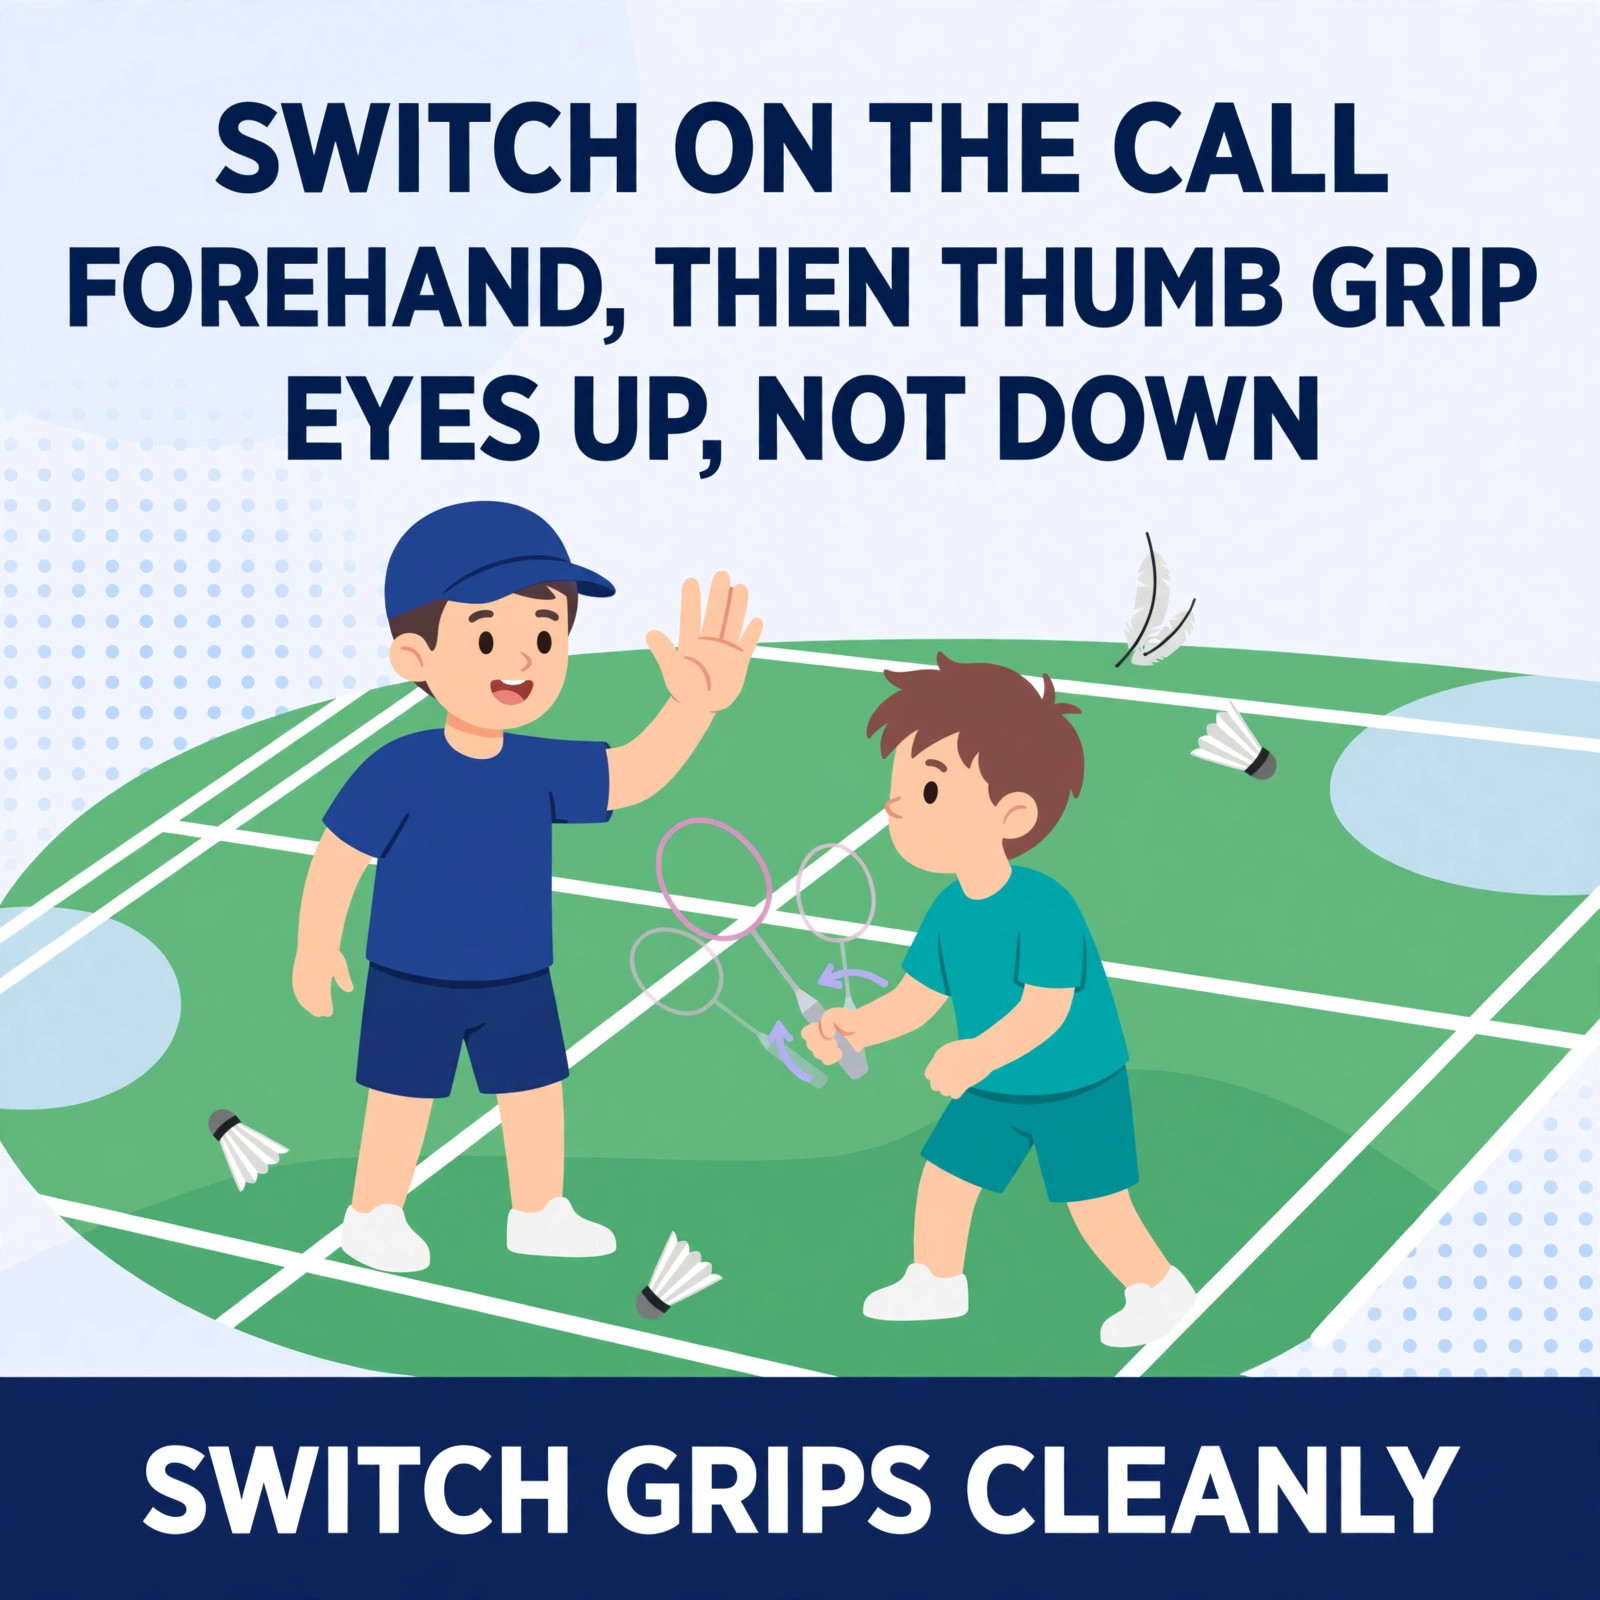
Start with the forehand grip, because every shot you ever play passes through it. Hold the racket as if you are shaking hands with the handle: the V between your thumb and index finger sits on top of the handle, your fingers wrap around in a relaxed curl, and there is a small gap between your palm and the grip. Relaxed is the word that matters. A beginner who squeezes the handle locks the wrist and forearm, and the swing turns stiff and slow before it even starts.
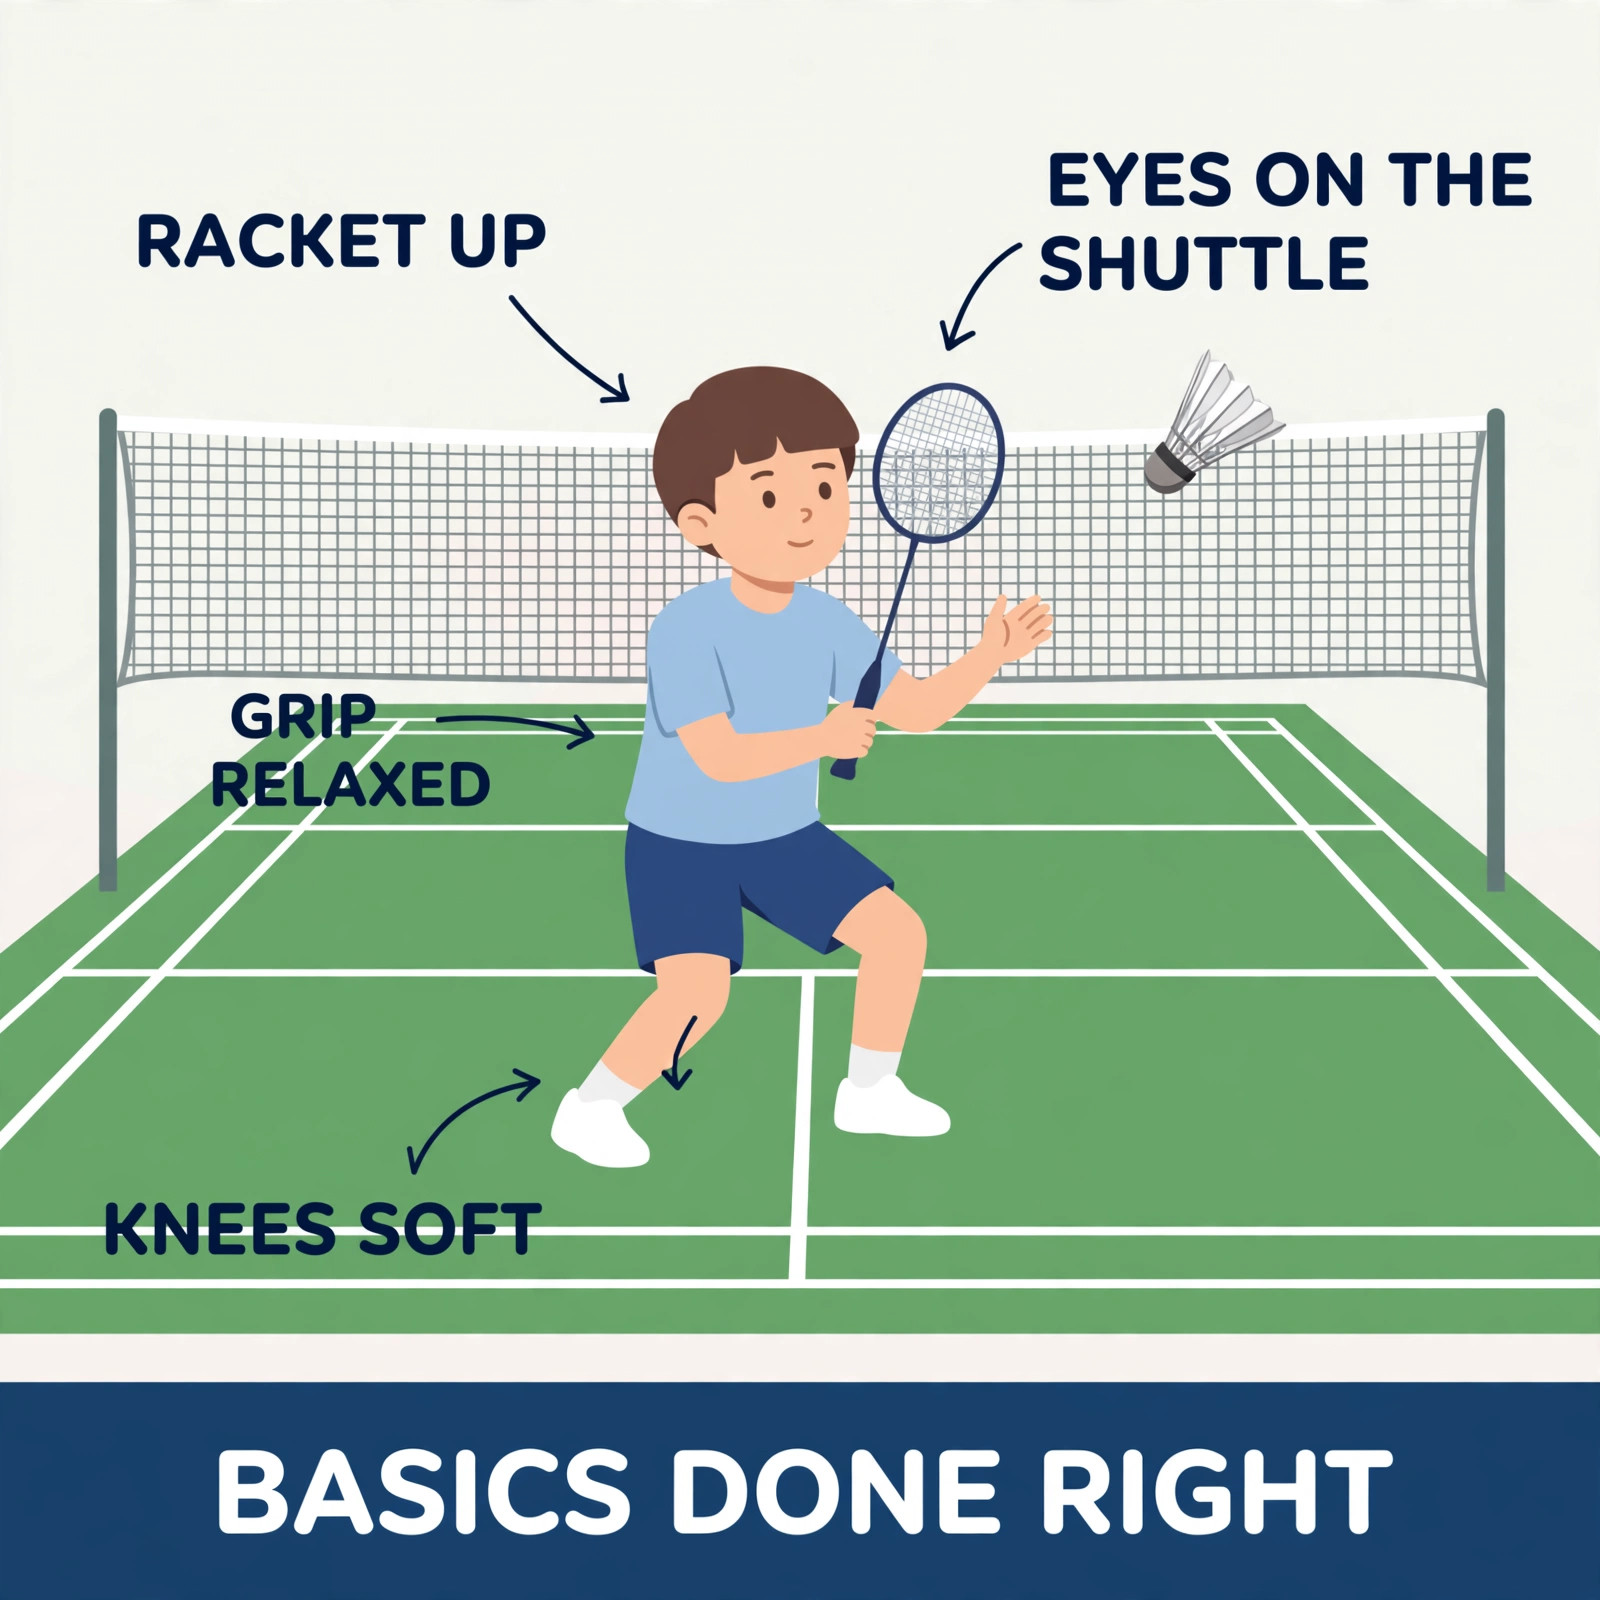
For backhand shots, turn the grip so your thumb presses flat against the wide side of the handle. That thumb is your lever for backhand clears, drives and net shots, and it only works if the other fingers stay loose. Then set your ready position: feet about shoulder width apart, knees soft, weight toward the front of your feet, racket held up in front of your body. From this base near the middle of the court, you can push off in any direction without a wasted first movement.
Technique Check #2
The Serve: Low, Legal and Under Control
The serve is the one shot you play with nobody pressuring you, so it is the best place to build good habits. Learn the low serve first. Stand close to the short service line, sideways on, with the racket head below your hand. The whole shot is played underarm, and the shuttle must be struck below 1.15 metres from the floor, which is the legal limit for every serve in modern badminton. If your serve starts above that height, it is a fault, however pretty it looks.
Hold the shuttle by its feathers, let it drop a short distance, and push it gently with a relaxed arm rather than hitting at it. The flight you want is flat and calm: the shuttle skims just over the tape and lands just past the short service line inside your opponent’s service box. In doubles this low serve is the main serve, because a serve that floats up gets smashed. Practise it in sets of twenty, aiming at a towel laid inside the box, and count how many land on it.
Once the low serve is steady, add the high serve for singles. It uses the same underarm action with a fuller swing, sending the shuttle high and deep so it drops close to the back line and pushes your opponent to the rear court. Later still comes the flick serve, a disguised lift of the low serve used to catch receivers who lean in. Order matters here: a flick built on a shaky low serve fools nobody, because your normal serve already looks different every time.

Technique Check #3
The Clear and the Drop: First Overhead Shots
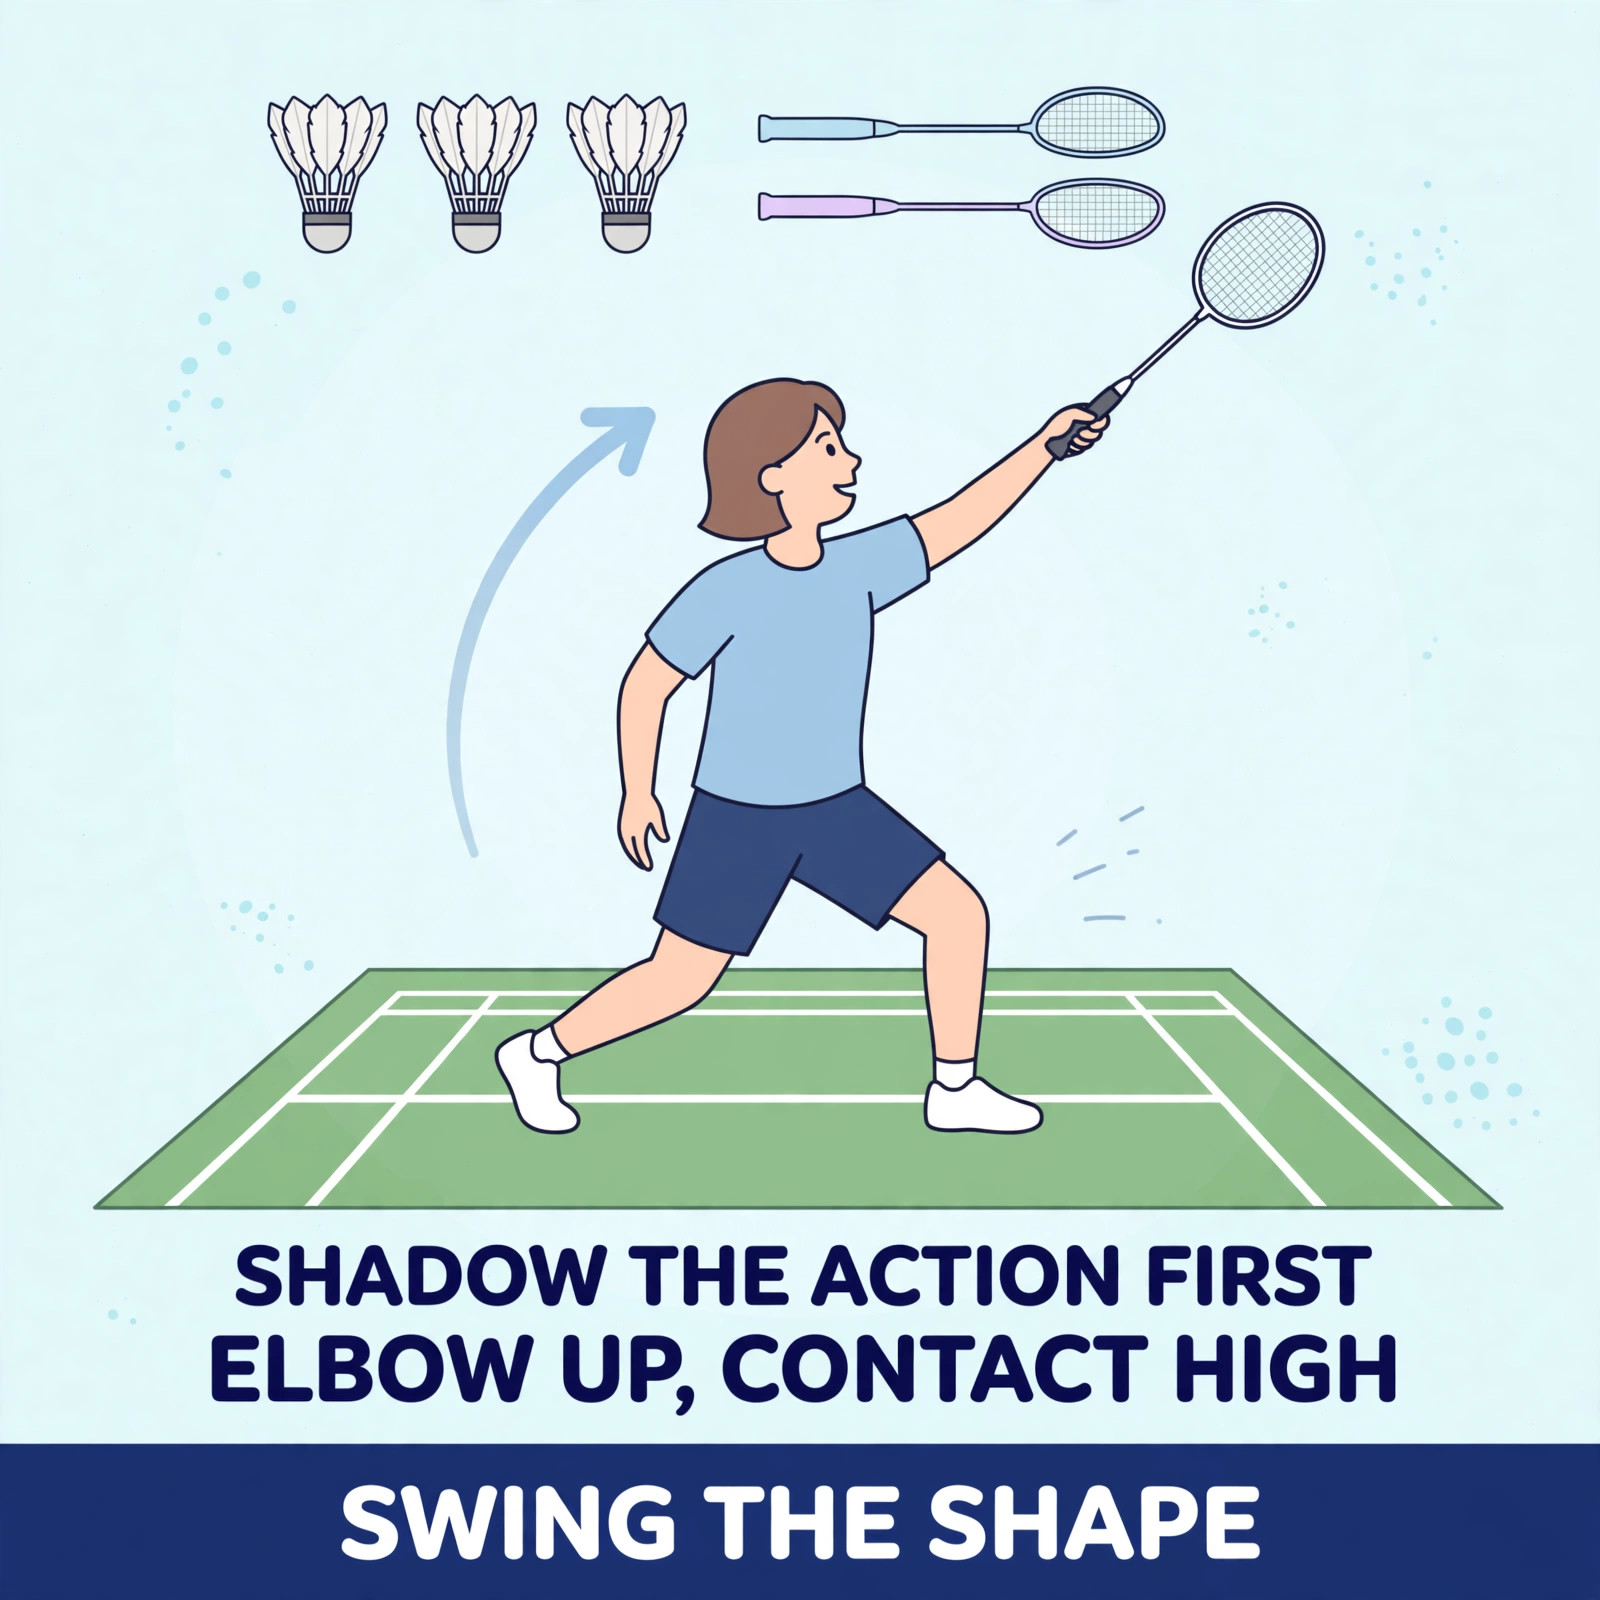
The clear is the first overhead shot to learn, and it teaches the action that the drop shot and the smash will both reuse. Stand side on, non racket shoulder pointing toward the net, racket taken back high with the elbow up. Swing up and forward, turning the forearm as you strike, and meet the shuttle high and slightly in front of your body. A good clear travels high and deep, forcing your opponent to the very back of the court, close to the rear boundary line.
The drop shot uses the same preparation and a softer finish. Set up exactly as you would for a clear: same stance, same backswing, same early swing speed. Only in the last moment do you slow the racket and guide the shuttle so it falls just over the net on the other side. That sameness is the whole value of the shot. If your drop looks different from your clear at the start, your opponent reads it early and the shot loses its point, which is keeping them unsure until the shuttle leaves your strings.
Two beginner errors spoil most overhead shots. The first is hitting with a stiff, straight arm and no forearm turn, which makes the swing all shoulder and no snap. The second is meeting the shuttle beside or behind the body, where there is no leverage left. Fix both with shadow swings: ten slow, full actions without a shuttle, checking your shape in a mirror or on a phone video, then the same action against gentle feeds. Shape first, power later. Power added to a broken shape just breaks it faster.

Technique Check #4
Net Shots and the First Footwork Patterns
Net shots reward touch, not strength. Move in early, take the shuttle as high as the net allows, and let the racket do very little: a soft push or a gentle slice that sends the shuttle tumbling just over the tape. The movement matters as much as the touch. Lunge in with your racket leg, keep your trunk tall, play the shot, then push back to base. A net shot played late, from below tape height, is really a lift waiting to happen, and your opponent knows it.
Footwork ties all of this together, and beginners only need a few patterns at first. The split step is the starter: a small, light landing on both feet just as your opponent strikes, which loads your legs for the first step. From there, learn the lunge for the front corners, the chasse step for sideways movement, and the habit of recovering to base after every shot. The court has six corners, but you do not need all six patterns on day one. Base, split, move, play, recover is enough to begin.
Put strokes and steps together in short, tidy blocks. Shadow a clear action, recover, then shadow a net lunge, recover. Then do the same against a partner feeding shuttles gently to two corners. What you are building is a loop: split, move, play, recover, split again. When that loop runs without thinking, rallies stop feeling like emergencies. Keep the feeds slow enough that your shape survives. The day your technique only works at walking pace is not a failure; it is the normal first stage of learning it.

Technique Check #5
How Technique Practice Fits the Week
Technique work is skill work, so it belongs early in a session while your mind and legs are fresh. Two or three sessions a week is a good rhythm for a beginner: enough repetition for the basics to settle, with rest days between so hands and shoulders recover. One theme per session works better than five themes in one. A serve session, a clear and drop session, a net and footwork session: that rotation covers the whole of this guide inside a fortnight.
A good technique session has a simple shape. Warm up and wake the ankles up. Spend ten minutes on tidy shadow work for the day’s theme. Move to fed drills, where a partner or coach sends shuttles at a pace you can handle with good shape. Finish with games or conditioned rallies where the new technique has to survive contact with a real opponent. If your shape falls apart in the games, that is information, not failure: it tells you which part needs another week of fed work.
Measure progress with counts, not feelings. How many of twenty low serves landed on the towel? How many of ten clears reached the back tramline area? How many net shots crossed without touching the tape? Write the numbers in a notebook after each session. Beginners often feel they are going nowhere while their counts quietly climb, and the counts are the truth. When the serve count and the clear count both rise together, your technique base is genuinely improving.

Myth vs Reality
Myths About Beginner Technique
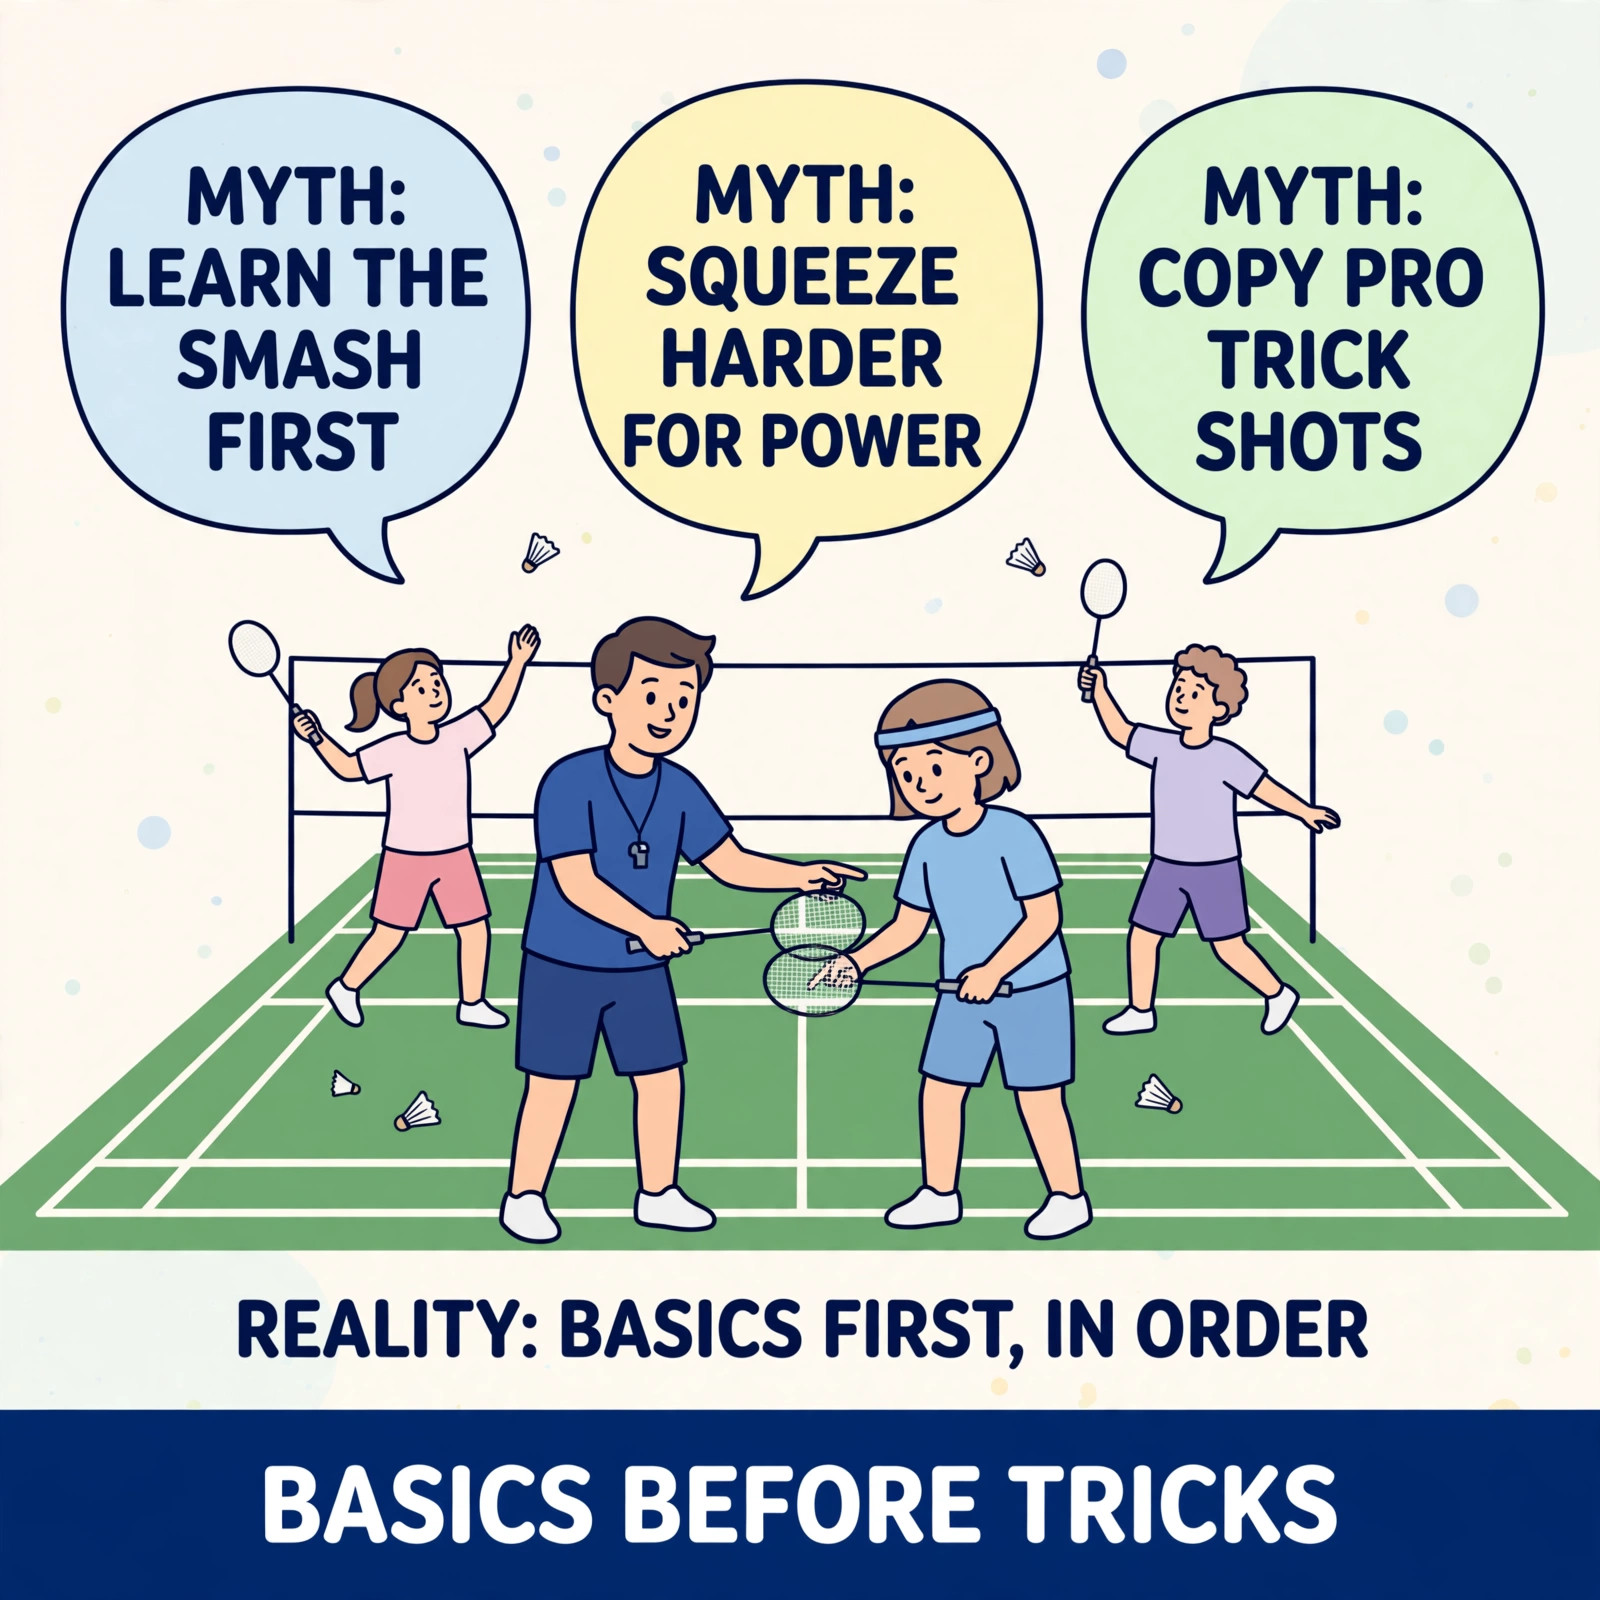
Myth one: beginners should learn the smash first because it is the most exciting shot. The smash is actually the last overhead shot to add, because it uses the clear action at full speed with a steeper angle. A player whose clear action is tidy picks up the smash quickly. A player who smashes first usually builds a swatting action with the wrong grip, and that action then has to be unlearned before the clear and drop can work properly.
Myth two: squeezing the racket harder gives you more power. It gives you the opposite. Power in badminton comes from a relaxed arm that speeds up late, with the fingers tightening only at the moment of contact. A grip that is clenched from the start slows the swing, tires the forearm and pushes the shuttle off line. Watch any strong player between rallies: the racket almost dangles in their fingers. The tight moment lasts a fraction of a second, at contact, and then it is gone.
Myth three: you can skip the basics by copying trick shots from professional matches online. Behind the back saves and spinning net shots look like shortcuts, and they are built on years of the plain techniques in this guide: the grip, the lunge, the touch at the net. Copied without those foundations, trick shots are party pieces that fail under any pressure. Learn the basics first and the tricks, if you still want them, become easy decorations on a game that already works.
Why Choose Us
Why Players Choose ST Badminton Academy
At ST Badminton Academy, beginner technique is coached in groups of no more than four students. That size matters most at the start: a grip held wrong for one session is a quick correction, but a grip held wrong for six months becomes a habit that fights every new shot. With four students, a coach sees every serve, every clear action and every lunge as it happens, and fixes the detail in the same session it appears. Your basics are set while they are still easy to set.
Coach Eric Chuar has spent more than 15 years coaching players in Singapore and Malaysia, and his beginner teaching follows the order of this guide for a reason: grip and ready position first, then the serve, then the overhead shots, then net play and footwork woven through everything. Students are checked against simple counts, serves on target and clears reaching the back, so progress is visible in numbers. Nobody is asked to copy a professional. They are asked to do the next basic thing properly.
The academy is based in Setapak, Kuala Lumpur. If you are picking up a racket for the first time, or coming back after years away, a trial session is the easiest start: bring your current grip and your current serve exactly as they are, and we will show you the first fix and the order to work in. No hype and no promises of overnight skill, just the basics taught in the right order, in a group small enough for real correction.
FAQs: Beginner Badminton Techniques in Malaysia (KL)
New players and parents ask the same fair questions before starting technique training. Here are straight answers, with no hype and no promises we cannot keep.
Where can I learn proper badminton technique if I live in Setapak or Gombak?
With us, in Setapak. ST Badminton Academy is based in Setapak, Kuala Lumpur, and beginners travel in from Gombak, Wangsa Maju and nearby areas for small group coaching. Technique is taught from the first session: grip, ready position and serve are checked by a coach, not left to guesswork or videos.
What should a beginner learn first in badminton training in KL?
The grip and the ready position, before any shot. A correct handshake grip and a balanced base make every later technique easier to learn, while a wrong grip quietly blocks your backhand and net shots for years. After that we teach the low serve, then the clear, then the drop shot.
How often should a beginner practise technique to reach a steady level?
Two or three sessions a week suits most beginners. Technique settles through short, regular practice rather than one long weekly grind, and rest days let your hands, shoulders and legs recover. Inside each session, work one theme at a time and finish while your shape is still tidy, not after it falls apart.
Can I learn badminton technique at home with no court or partner?
Partly, yes. Shadow swings, grip switches and split step practice need only a small clear space, and they keep your technique warm between sessions. What home practice cannot give you is a shuttle arriving at real speed, or a coach watching your shape, so treat it as support work alongside coached sessions, not a replacement.
What is the best order to learn these techniques in one session?
Start fresh with the tidy work: shadow swings and grip checks while your mind is clear. Then practise one technique against gentle feeds, and finish with games where that technique has to survive real rallies. If your shape falls apart late in the session, step the feeds back a level and rebuild it calmly.
Do you offer beginner technique coaching near Wangsa Maju?
Yes. Our base is in Setapak, a short drive from Wangsa Maju, and beginner technique coaching runs inside our regular small group sessions rather than as a separate class. With no more than four students in a group, your grip, serve and overhead action get watched and corrected on every visit, from your very first session.
Are these beginner techniques suitable for young kids in Malaysia?
Yes, with the work scaled to the player. Young kids learn the same techniques through games, shorter drills and lighter rackets they can swing without dropping the head. Groups stay small, so a coach watches grips and landings closely. The order stays the same as for adults: grip first, then serve, then shots.
Where does ST Badminton Academy teach beginner badminton technique?
At our home base in Setapak, Kuala Lumpur. Beginner technique coaching runs inside regular small group training, with no more than four students per group, so basics are watched closely from day one. Players come in from Gombak, Wangsa Maju and across the Klang Valley, and trial sessions can be arranged through the academy.
What does a good coach watch first when a beginner plays badminton?
The grip, before anything else. A coach watches how the racket sits in your hand, then your ready position, then whether your feet split and recover or stay planted. Those three checks explain most beginner errors, and they can all be corrected in your first sessions, which is why coached beginners improve faster than video learners.
Beginner Badminton Technique Training in Action


One Standard for Every Player and Every Session
Technique is tested at this academy before it is trained further. A new beginner shows us their grip, plays ten low serves at a target and hits clears from a feed, so the starting point is honest. The standard after that is simple: the grip stays correct without reminders, serves land in the box more often each month, and clears reach the back of the court with the same action as the drop. Checks are written down, so progress is something you can point to.
| Factor | Copying Videos | Coached Technique Training TECHNIQUE |
|---|---|---|
| Frequency | 1 or 2 times a week. Mostly for fun and sweat. | Two or three coached sessions a week, basics learned in the right order. |
| Drills Focus | Basic static feeding. Minimal footwork pressure. | Grip, serve, clear, drop and net shots taught step by step. |
| Physical Conditioning | Rarely included. Just playing games on court. | Core, agility, and speed training included in every session to prevent injury and build stamina. |
| Tactical Awareness | "Just hit it over." No real game plan. | Video analysis, point construction, and learning to read the opponent's game. |
| Coach Ratio | Large groups (8-10 kids). Coach barely watches you. | Max 4 students. Mr Eric Chuar personally corrects every stroke and movement detail. |
| Goal Setting | Fun and exercise. | Mistakes spotted and fixed in the same session they appear. |
| Long Term Result | Good recreational player. | A beginner whose basics stay correct as the game speeds up. |
Beginner Badminton Technique Classes in Kuala Lumpur
This page covered the seven basics every beginner needs: grip, ready position, serve, clear, drop shot, net shot and the first footwork patterns. ST Badminton Academy runs small group beginner coaching of no more than four students in Setapak, Kuala Lumpur. If you are in Wangsa Maju, Gombak or nearby and want your technique built in the right order, contact us today and book a trial session.