Unleash The Powerful Badminton Jump Smash With Expert Tips (Jump Smash Guide)
The jump smash is the shot every player wants and the shot most players rush. Done well, it is not really about height. It is about timing: arriving behind the shuttle early, leaving the ground at the right moment, meeting the shuttle at the very top of the jump, and landing ready for whatever comes back. A small jump with perfect timing beats a huge jump taken late, every single rally. This guide covers the jump smash the way we coach it at ST Badminton Academy in Setapak, Kuala Lumpur: why it wins points, the approach, the jump itself, the contact, the landing, and the safe way to build the whole movement in training.
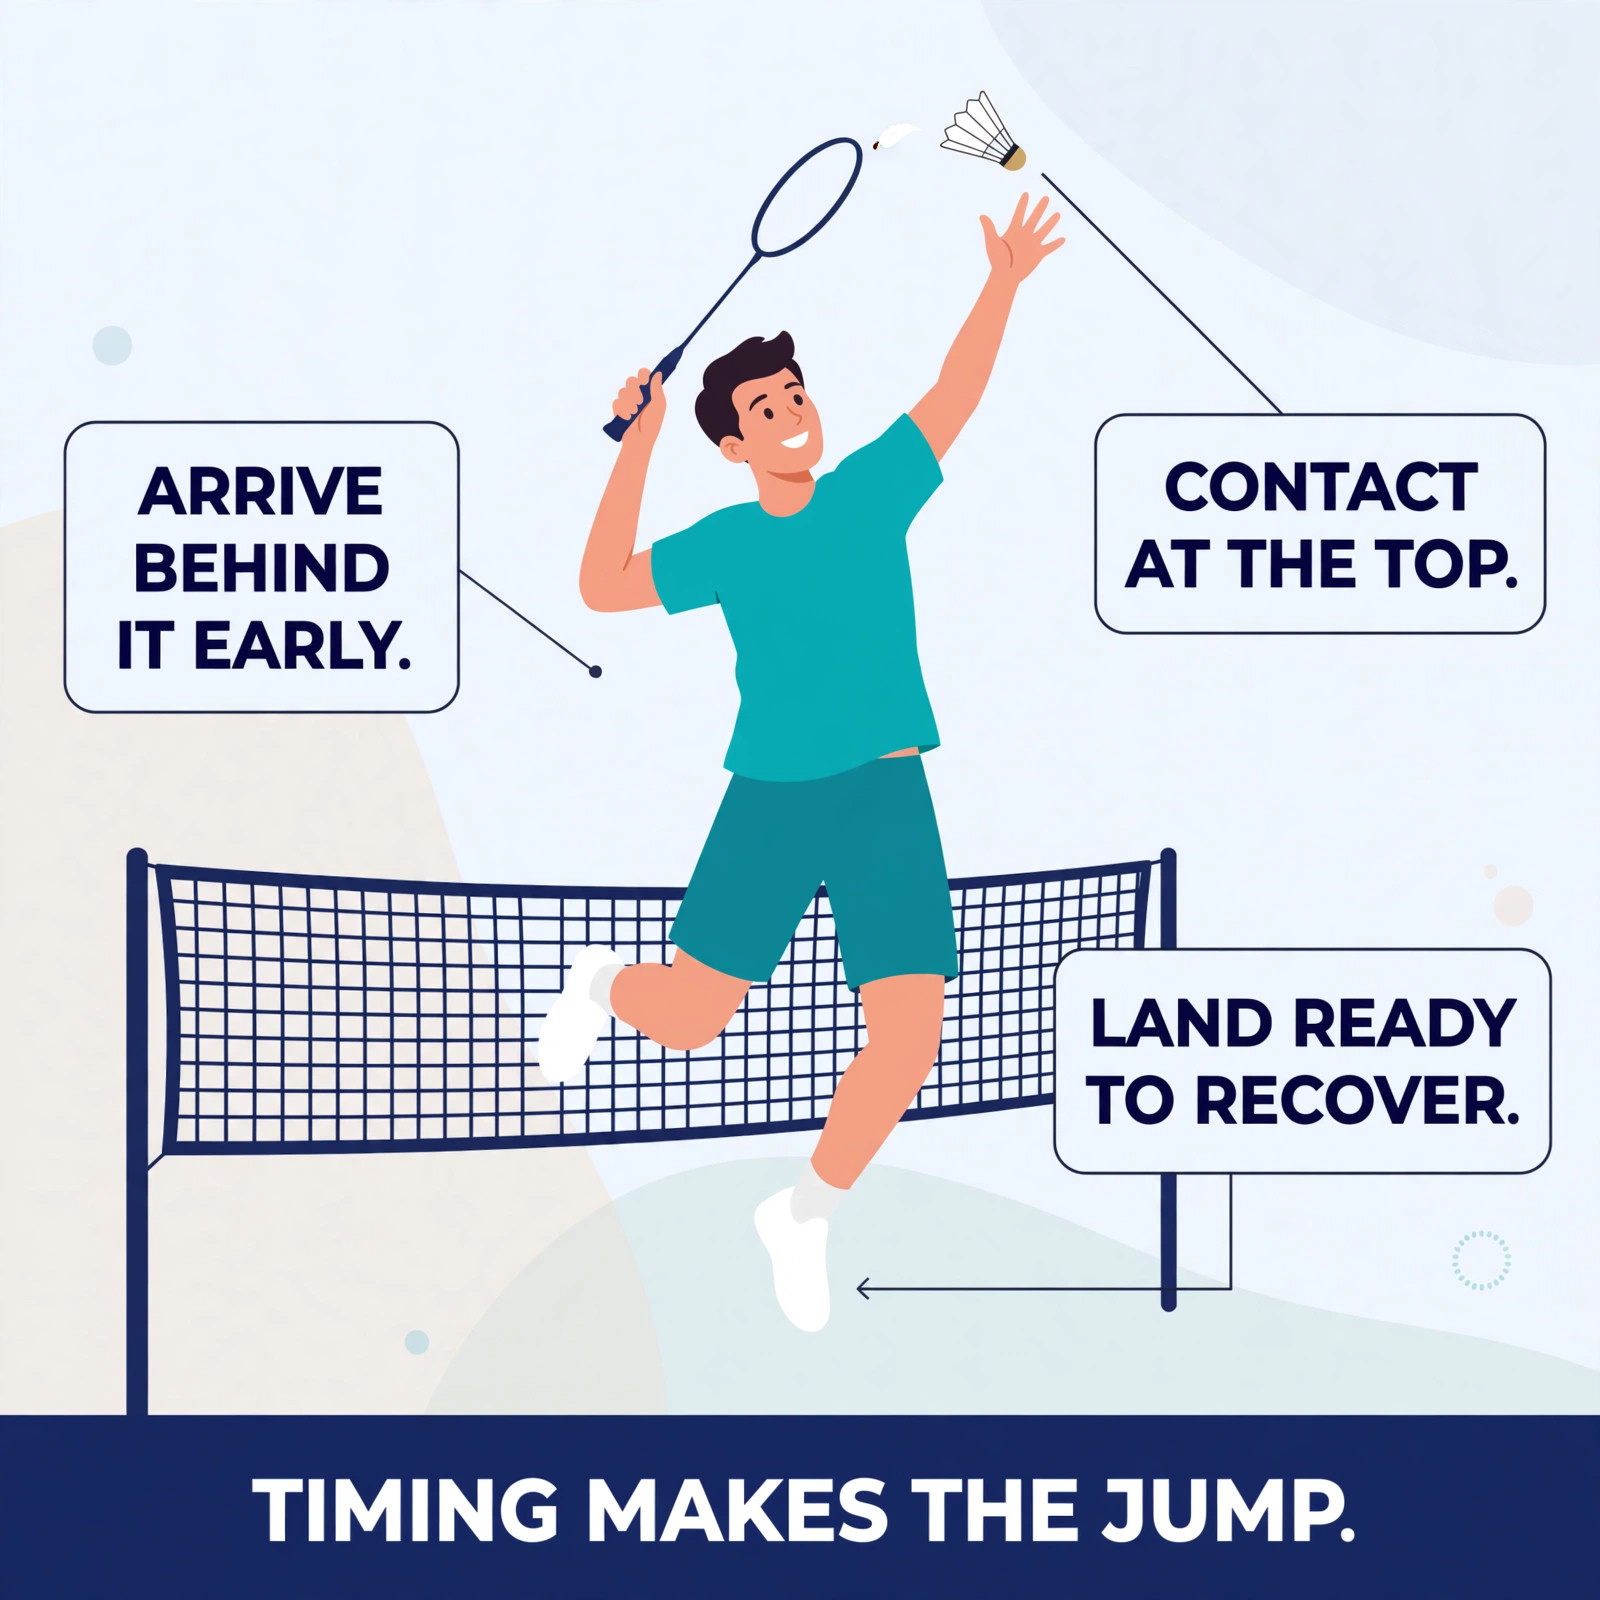
Jump Check #1
Why the Jump Smash Wins Clean Points
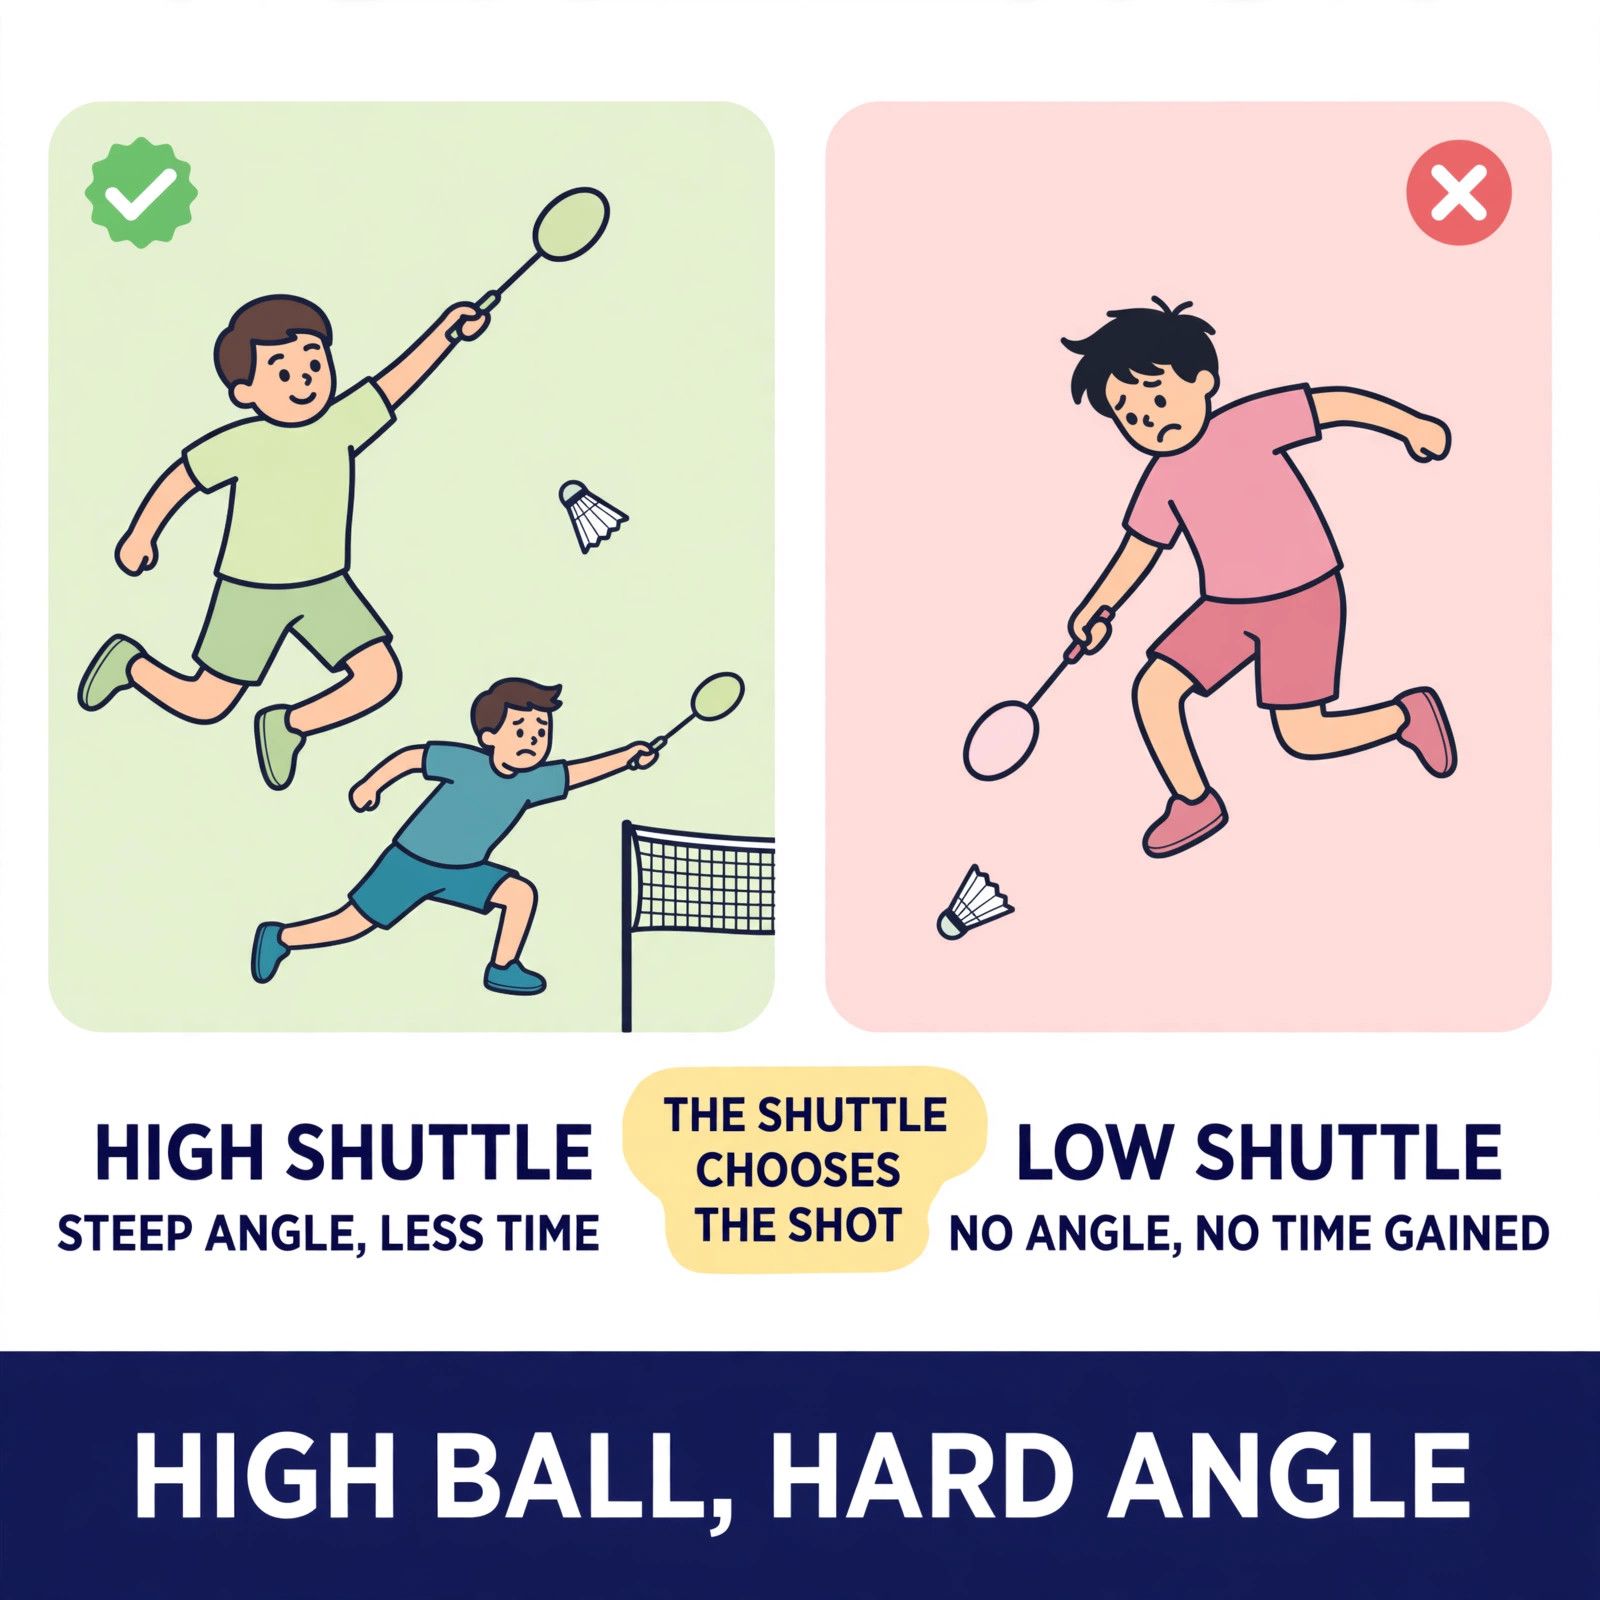
The jump smash wins points for two reasons. The first is angle. Contact a metre higher than a standing smash means the shuttle can travel down more steeply, landing closer to the net on your opponent’s side and cutting the court they can defend. The second is time. A steep, fast smash gives the defender less time to read, move and set, and it often forces a weak reply even when it does not win the point outright. The jump smash is often the start of the winning sequence rather than the winner itself.
It also has a cost, and honest players respect it. A jump smash commits your whole body. If you jump from a bad position, or at a shuttle that was never high enough, you land off balance while the rally continues without you. The shot belongs to a simple situation: a high shuttle, enough time to get behind it, and an opponent who is deep, rushed or out of position. Used there, it is a weapon. Used everywhere, it is a leak. Picking the moment is part of the technique, and it is the part this page teaches alongside the jump.
Jump Check #2
The Approach: Get Behind the Shuttle
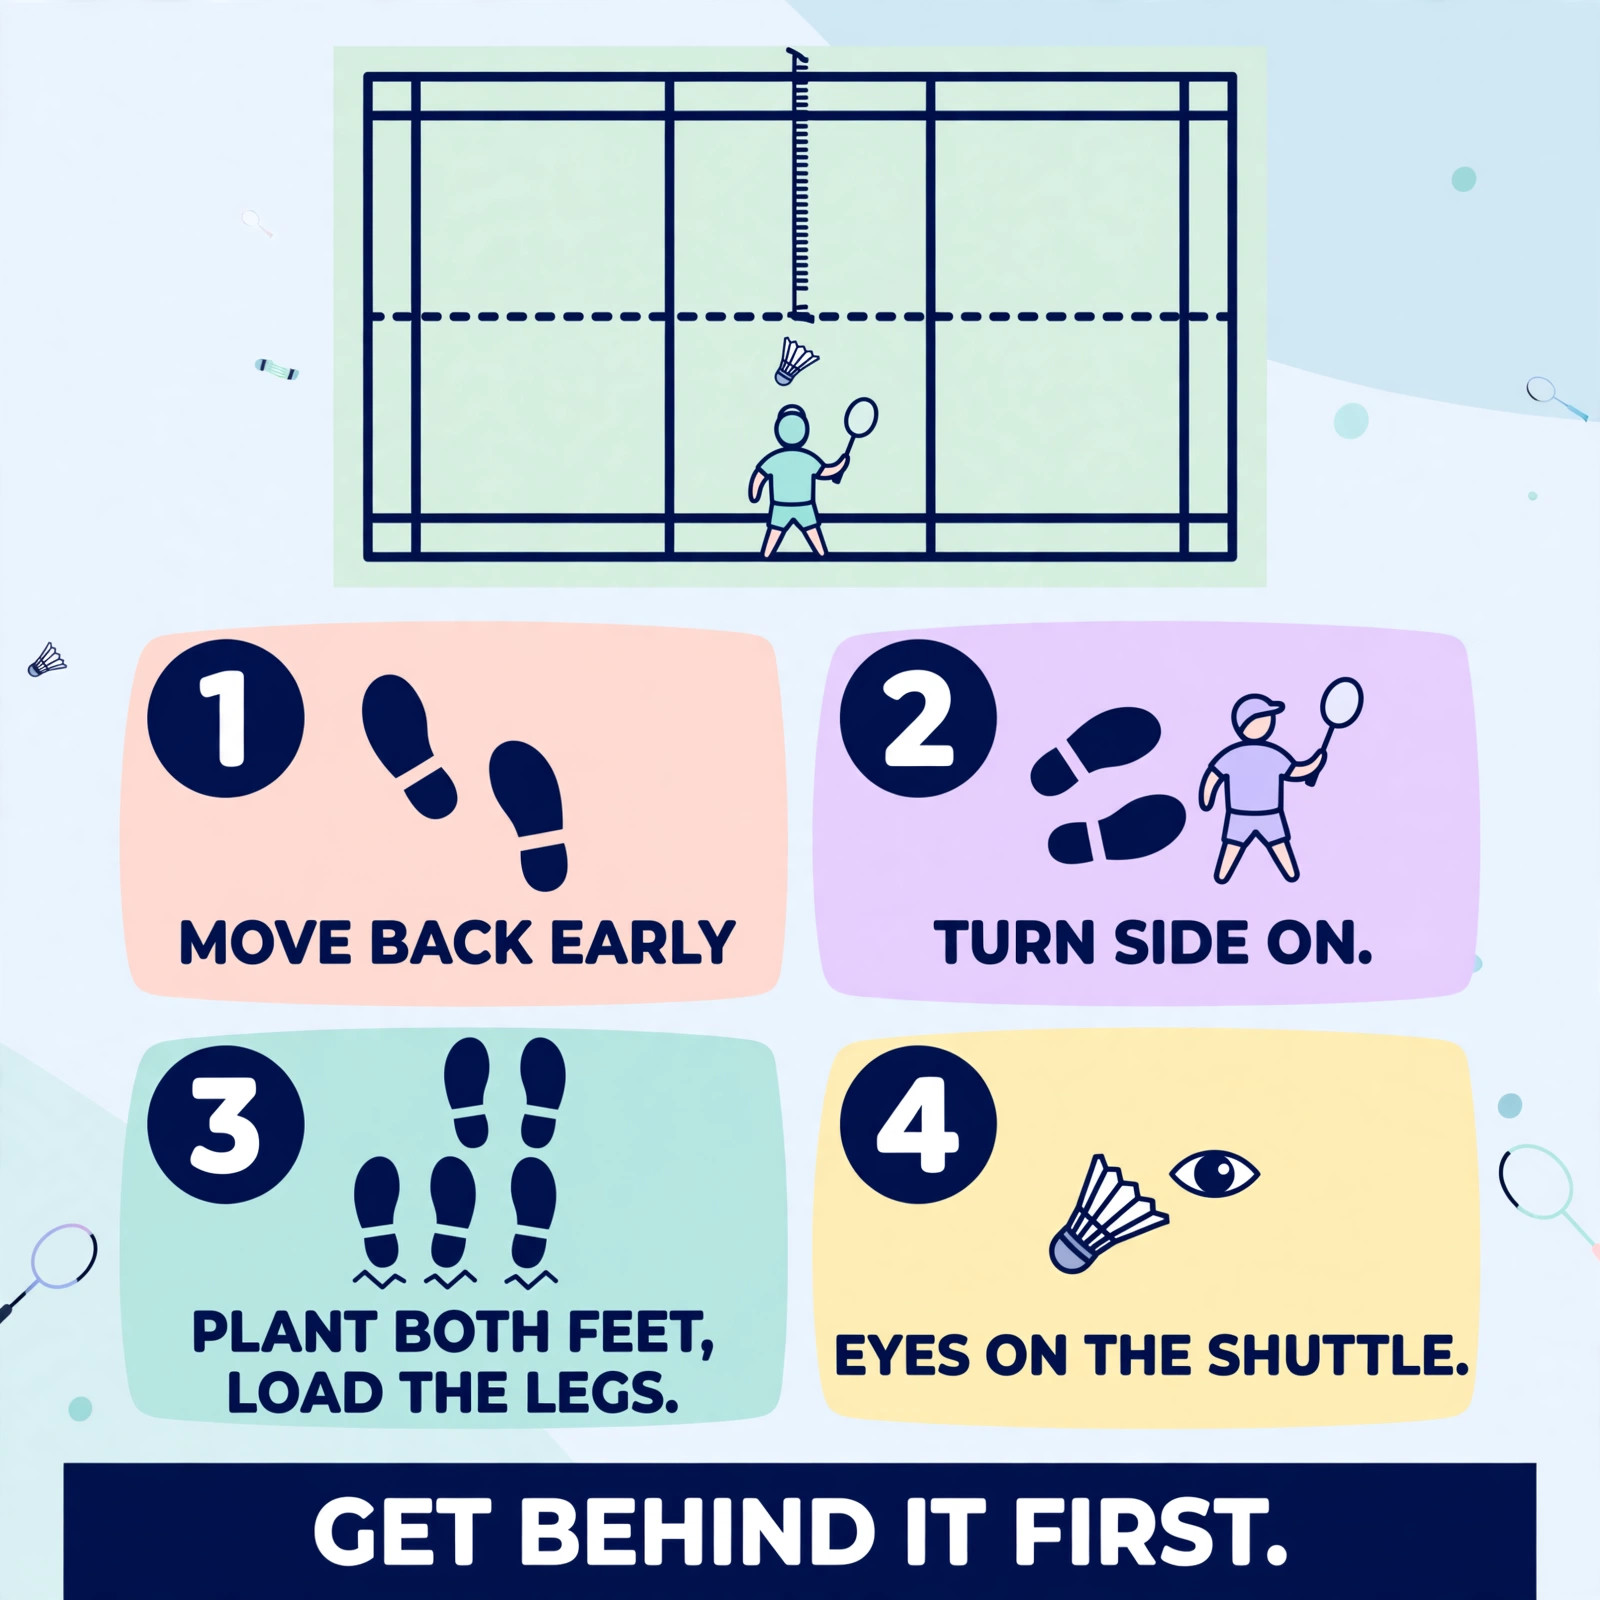
Everything starts before your feet leave the floor. Move back early and get behind the shuttle, so it is slightly in front of you at contact, never above or behind your head. Travel with quick steps, turn side on as you arrive, and keep your eyes on the shuttle the whole way. Players who watch the shuttle late arrive late, and a late arrival cannot be rescued by a bigger jump. Your non-racket arm points up toward the shuttle as you set: it tracks the target, balances the turn, and starts the rotation before the swing.
The last step loads the jump. Plant both feet roughly together, knees bent, weight loaded through the legs like a spring being pressed down. Take off from two feet for most jump smashes: it is more stable than one, it points your body at the shuttle, and it lets both legs drive the height. The take-off should feel like jumping up to meet the shuttle, not jumping at it. Height comes from the legs and the timing of the jump, not from throwing your body forward, which only carries you under the shuttle and ruins the angle.
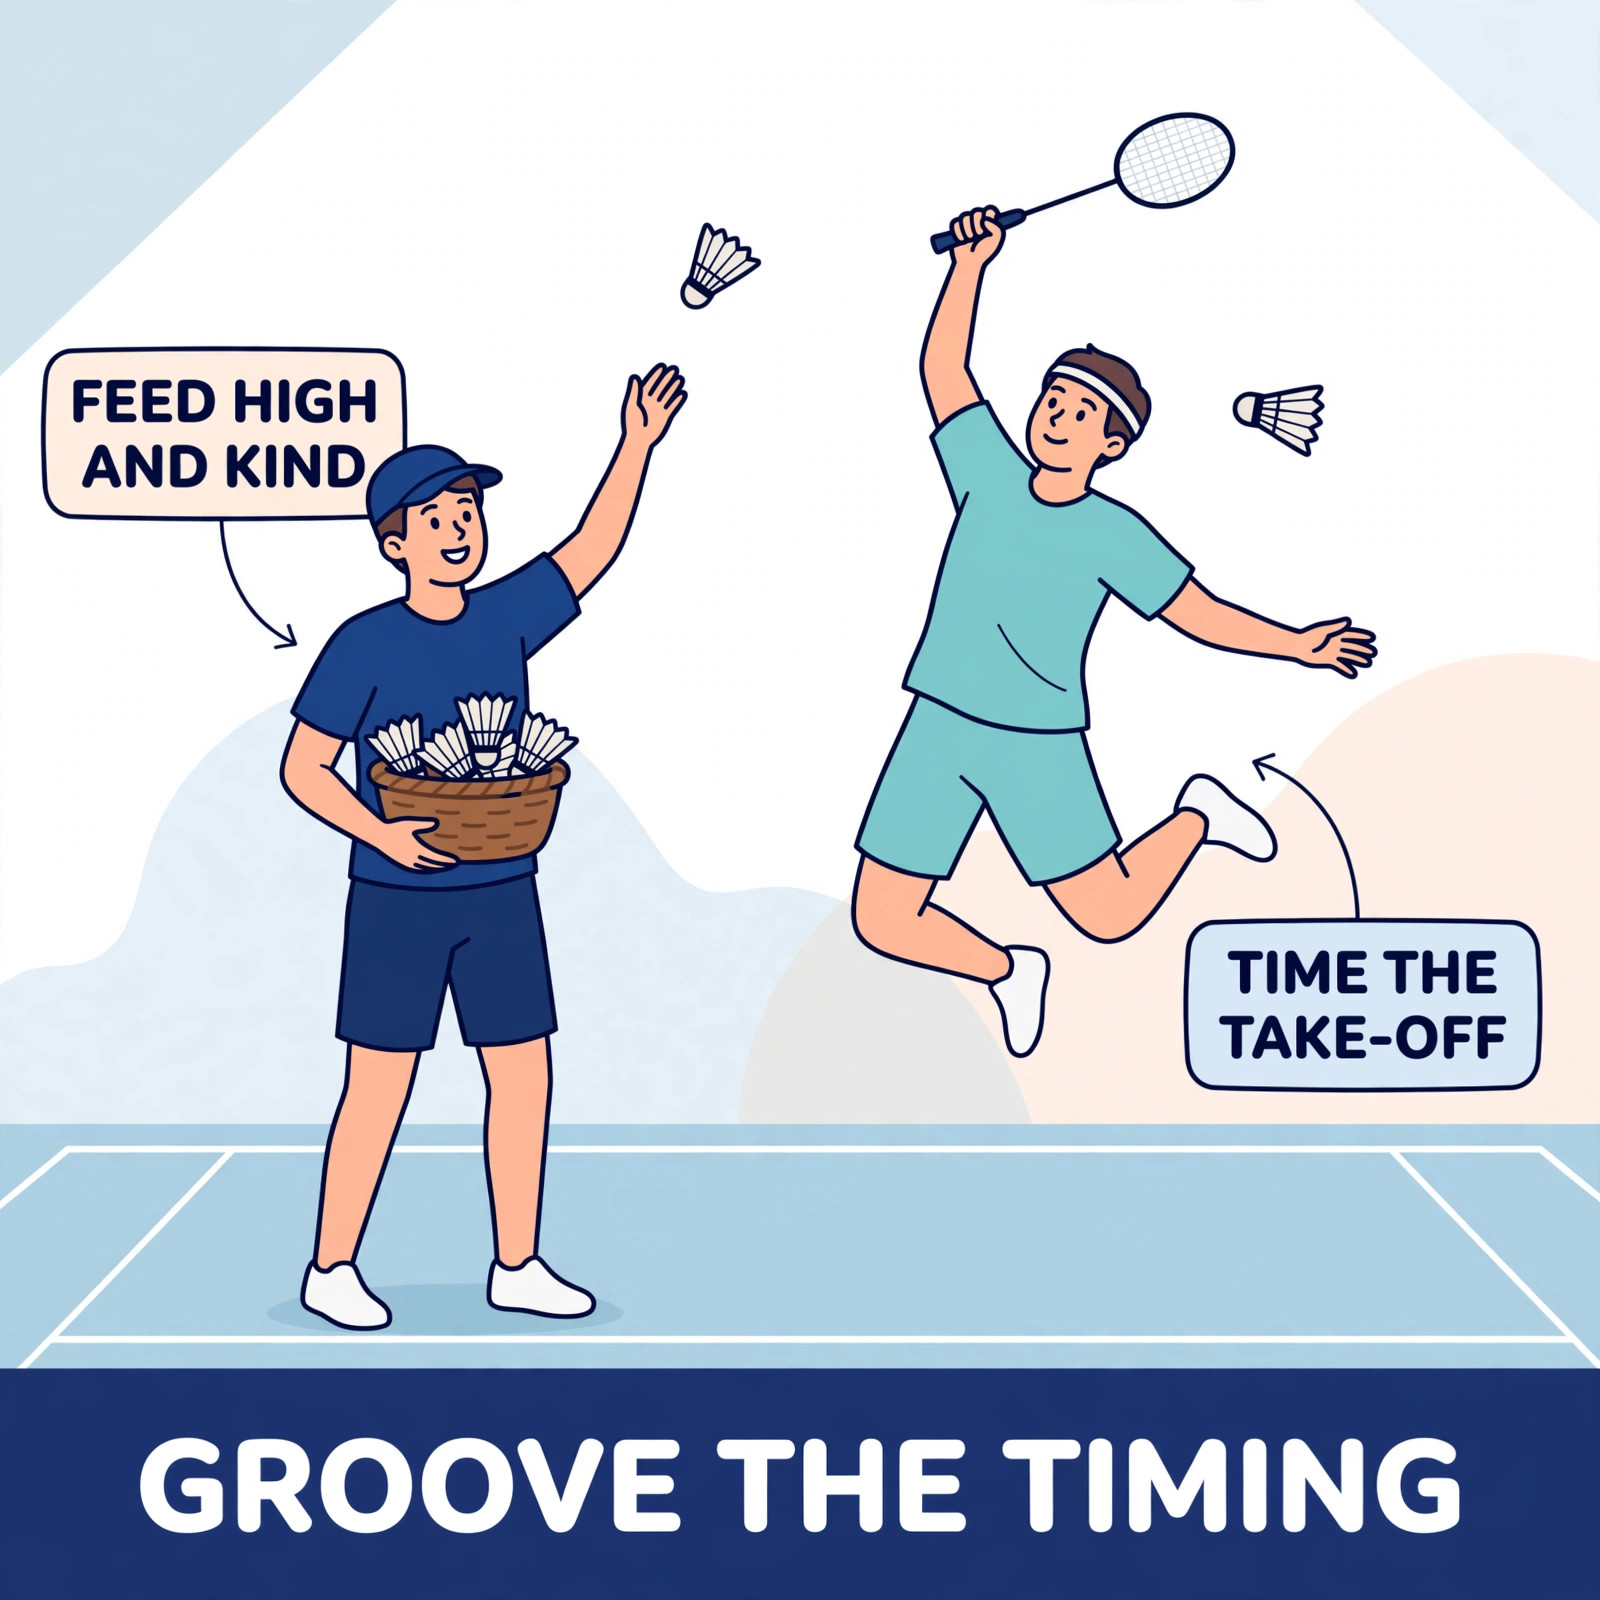
Timing the take-off is the skill inside the skill. Jump too early and you are falling as you hit, and a falling smash loses both height and direction. Jump too late and the shuttle has dropped, the angle is gone, and you are reaching up at a ball that needed to be met at its peak. The right moment feels like this: the shuttle is still rising into your hitting zone as you leave the floor, and you meet it at the very top of your jump, arm reaching high, contact in front. Groove that feeling with shadow jumps first, then with fed shuttles, until the timing is in your legs and not in your thoughts.
Jump Check #3
In the Air: Height, Turn and Timing
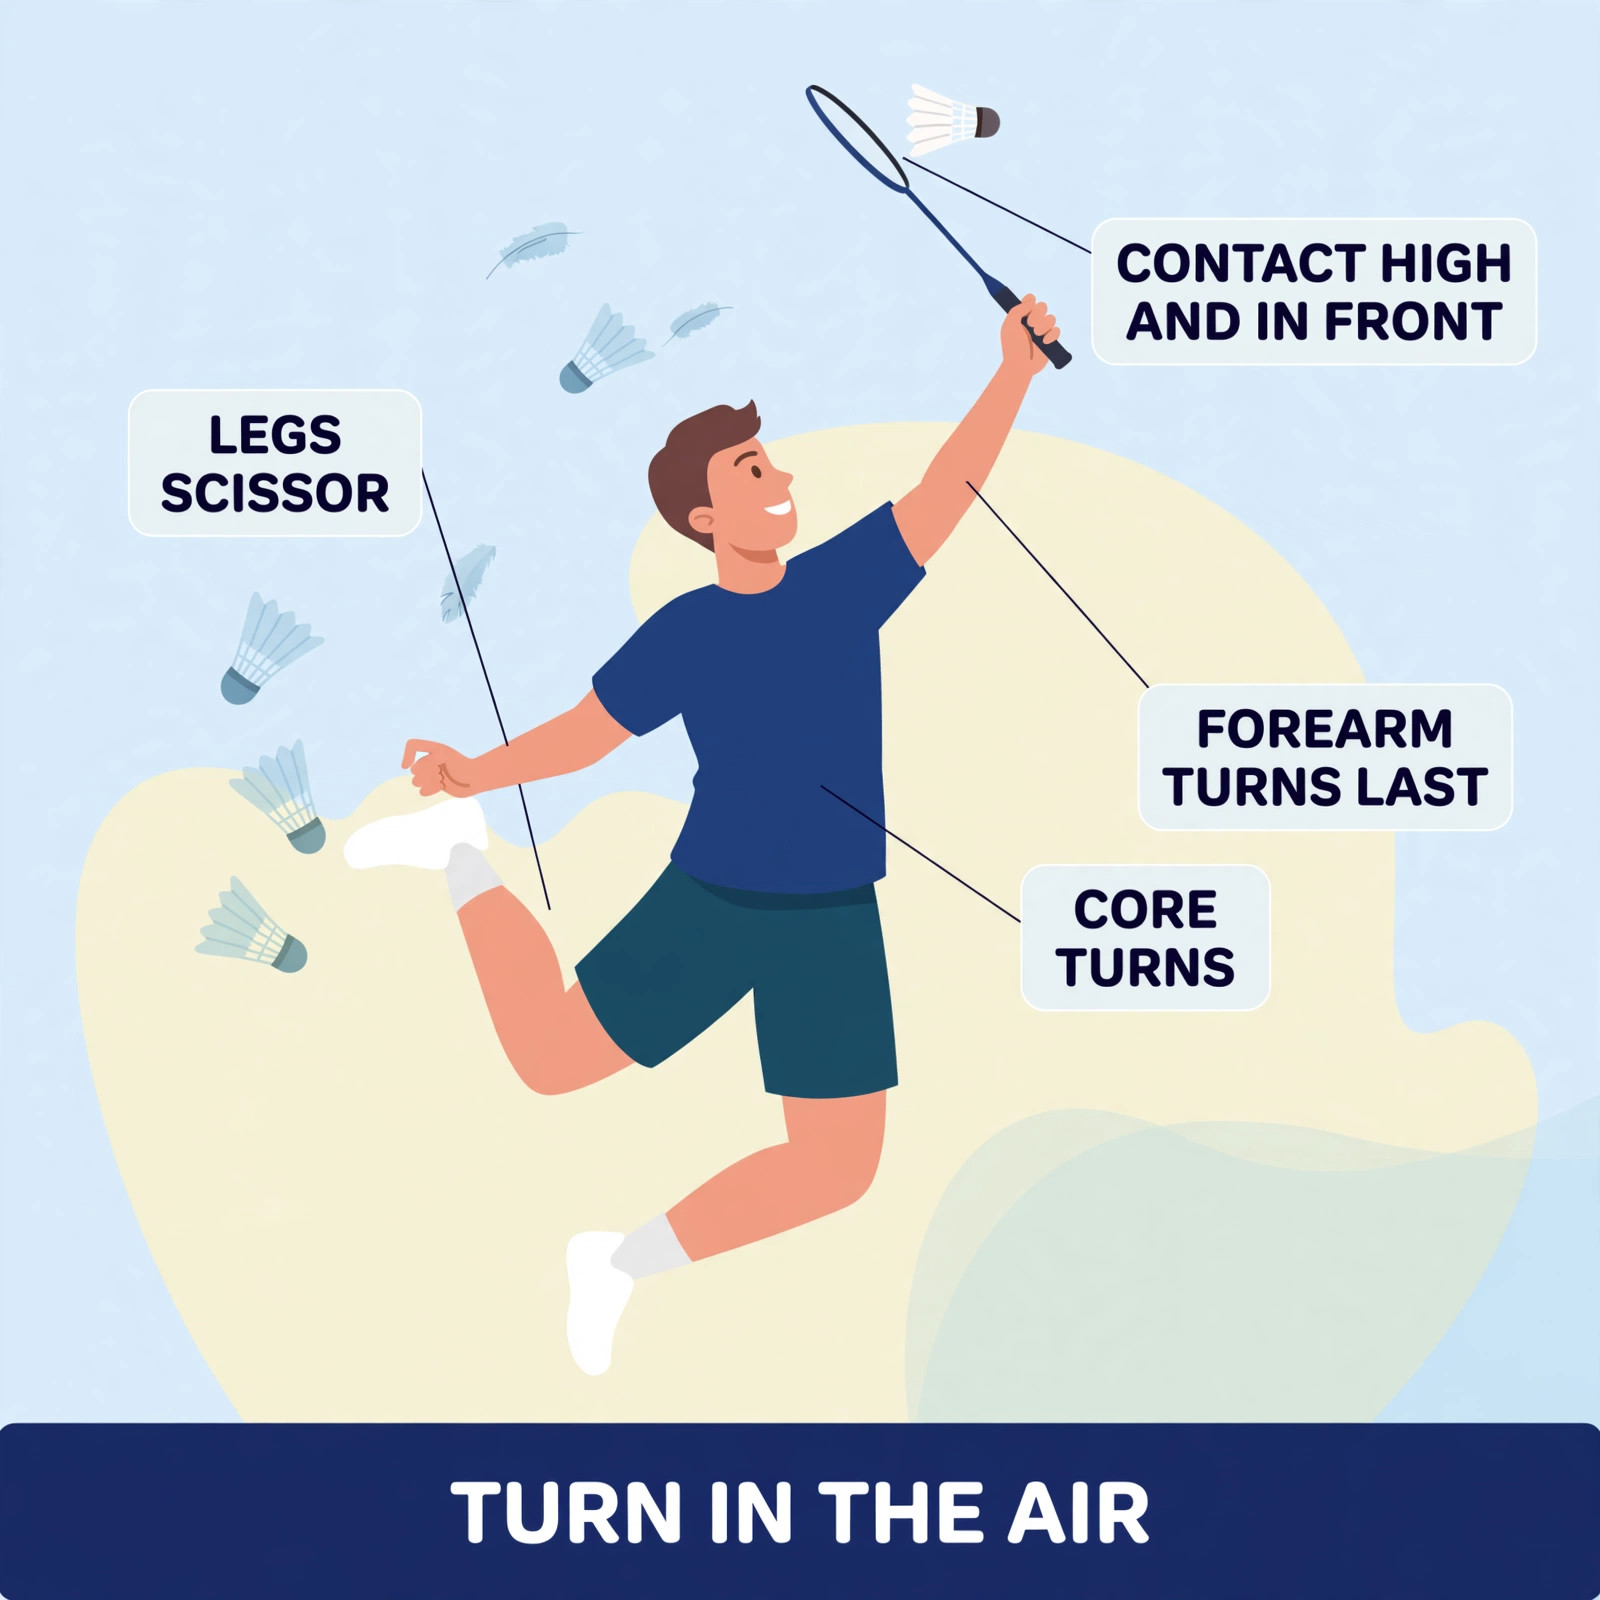
At the top of the jump, the body does the work in one chain. Your legs scissor as you strike: the racket leg kicks back and the other leg comes through, which turns your hips and shoulders through the shot and points your body back toward the net for the landing. The core rotates, the shoulder follows, the forearm turns the racket face square at the last moment, and the fingers squeeze through contact. It is the same power chain as a standing smash, performed in the air, which is why we teach the standing chain first and add the jump to a swing that already works.
Contact is high and in front, at full reach. This is where most jump smashes are won and lost. Contact in front means the steep angle is available and your body weight can travel down through the shot. Contact above your head flattens the angle. Contact behind you turns the biggest swing in badminton into a weak clear with extra steps. If you remember one cue from this section, take this one: jump to where the shuttle will be, and let it come down into your reach, onto a racket that is already waiting high.
Aim like a player who expects the rally to continue. The steep smash goes to the sidelines and at the body of a defender who is still moving; the stick smash, shorter swing and faster hands, rushes the front defender in doubles. Cross court looks spectacular and opens your own court wide if it comes back, so it needs the best contact of all. Pick targets by the defender’s position, not by your mood. A well aimed jump smash at eighty percent beats a wild one at full stretch, because the wild one that misses by a metre teaches your opponent to relax.
Jump Check #4
The Landing: Recover or Lose the Rally
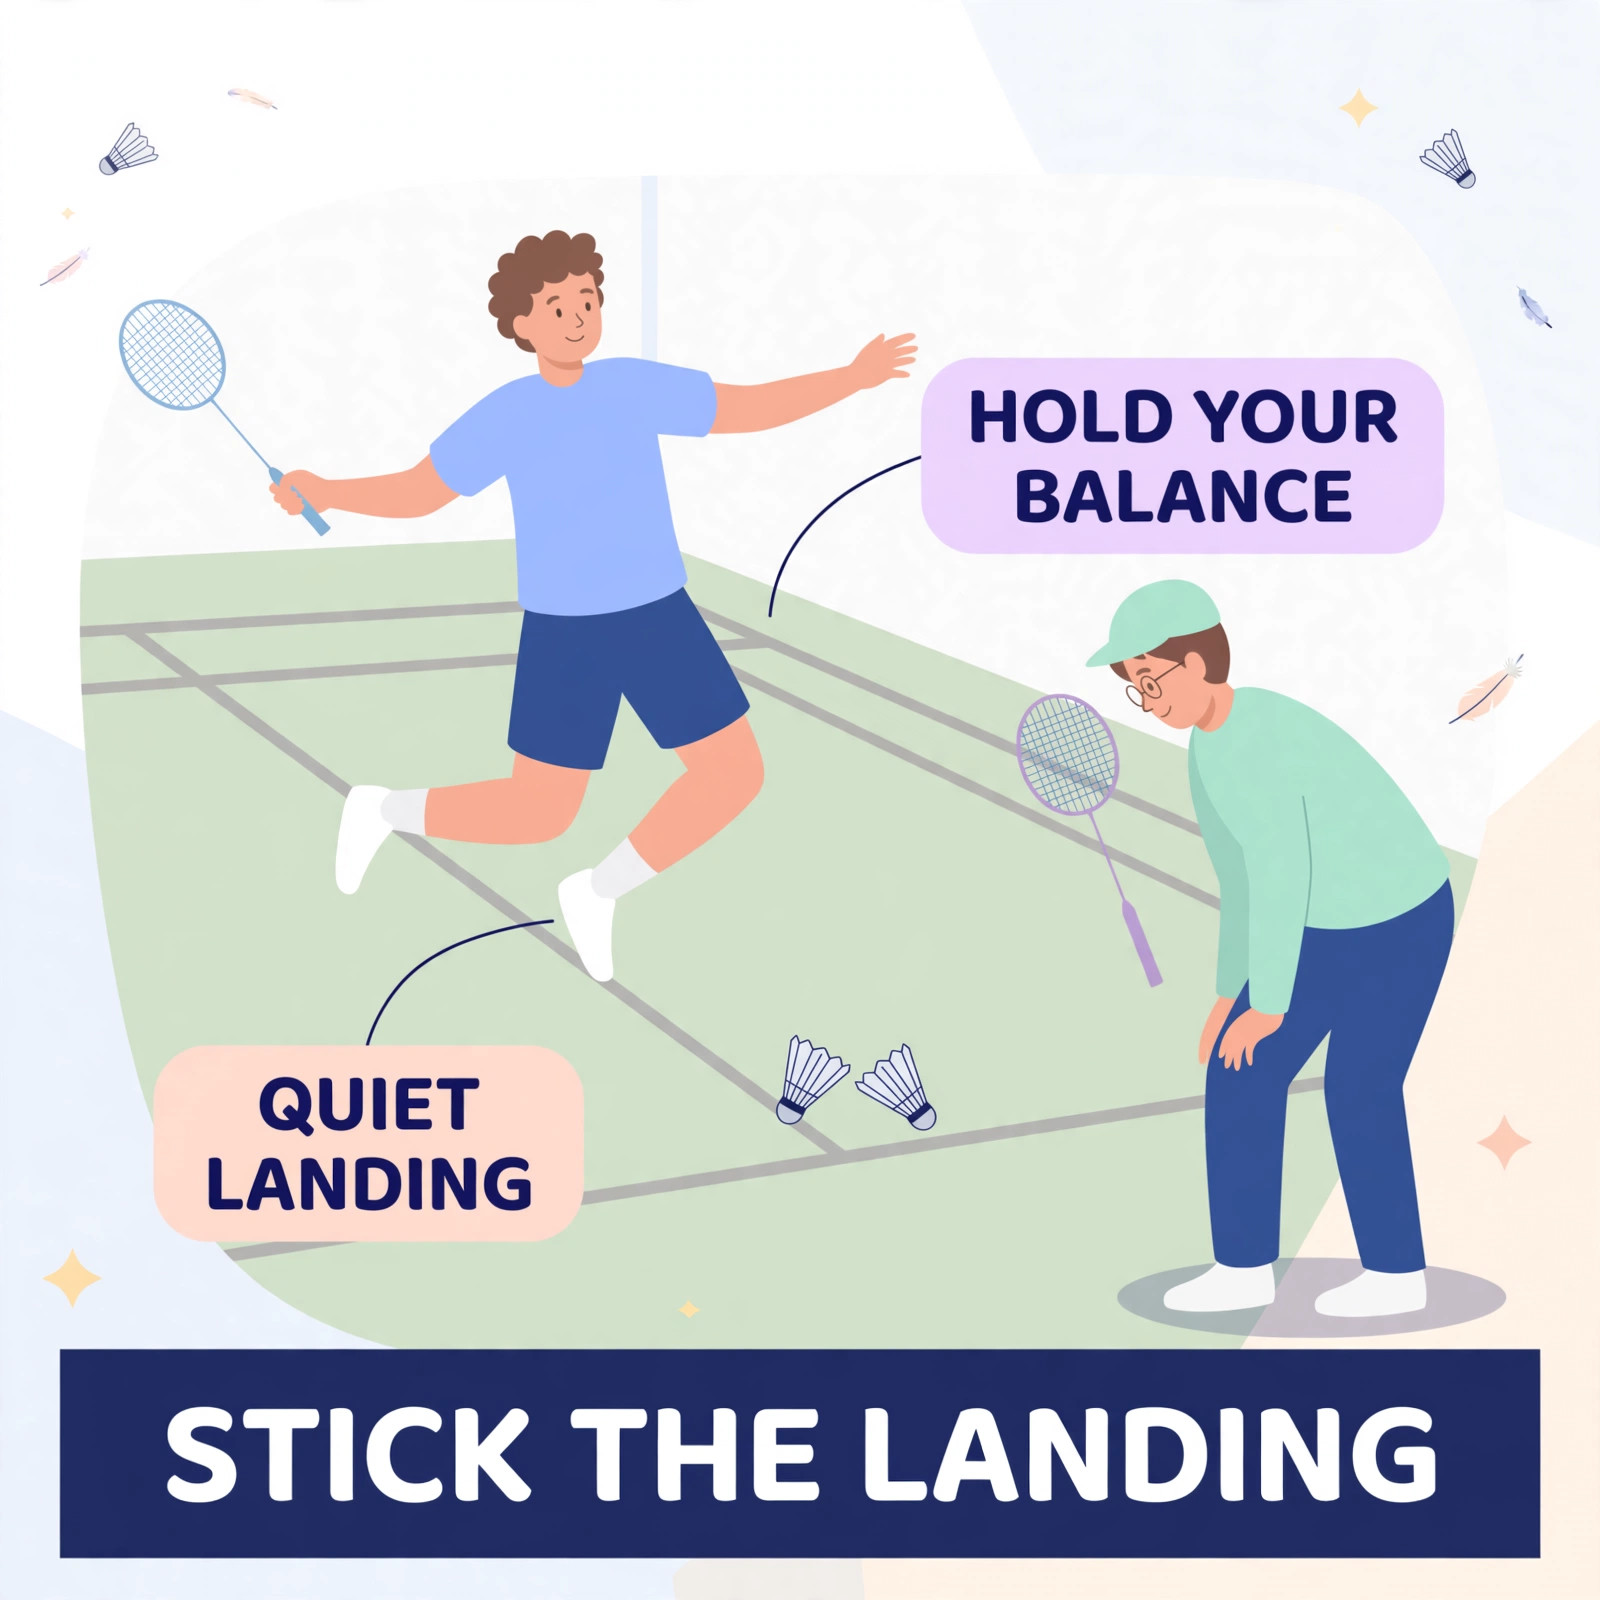
The landing is part of the shot, not the celebration after it. Land on both feet, knees soft, chest up, and let the legs absorb the drop the way they absorbed the take-off. A stiff, straight legged landing sends the whole landing load into your knees and ankles, and it also leaves you standing still while the rally moves on. Land balanced and your scissor has already turned you to face the net, feet under you, ready to move. The best jump smashers look boring on landing. That is not an accident. That is the skill.
Then recover, immediately. The first step after landing goes back toward base, taken before you admire the shot. A good defender will block your best smash back sometimes, and the point is only lost if you are still travelling forward when the block crosses the net. Build the recovery into the drill from day one: smash, land, recover, split step. In matches, the players who keep their jump smash dangerous for three games are the ones whose landing costs them nothing, because the movement after it is automatic.
Respect the load honestly. Jumping and landing at full height, dozens of times a session, is real work for knees, ankles and Achilles tendons. Build it gradually, keep the landing form clean, and stop the jumping part of practice when your landings get loud and stiff, because that is tired technique practising itself. None of this removes the risk of a hard landing sport entirely, and nobody honest promises that. Good form, gradual load and proper court shoes lower the risk a long way, which is why the next section builds the jump in steps instead of in leaps.

The Build
Build the Jump: Legs, Practice and Racket
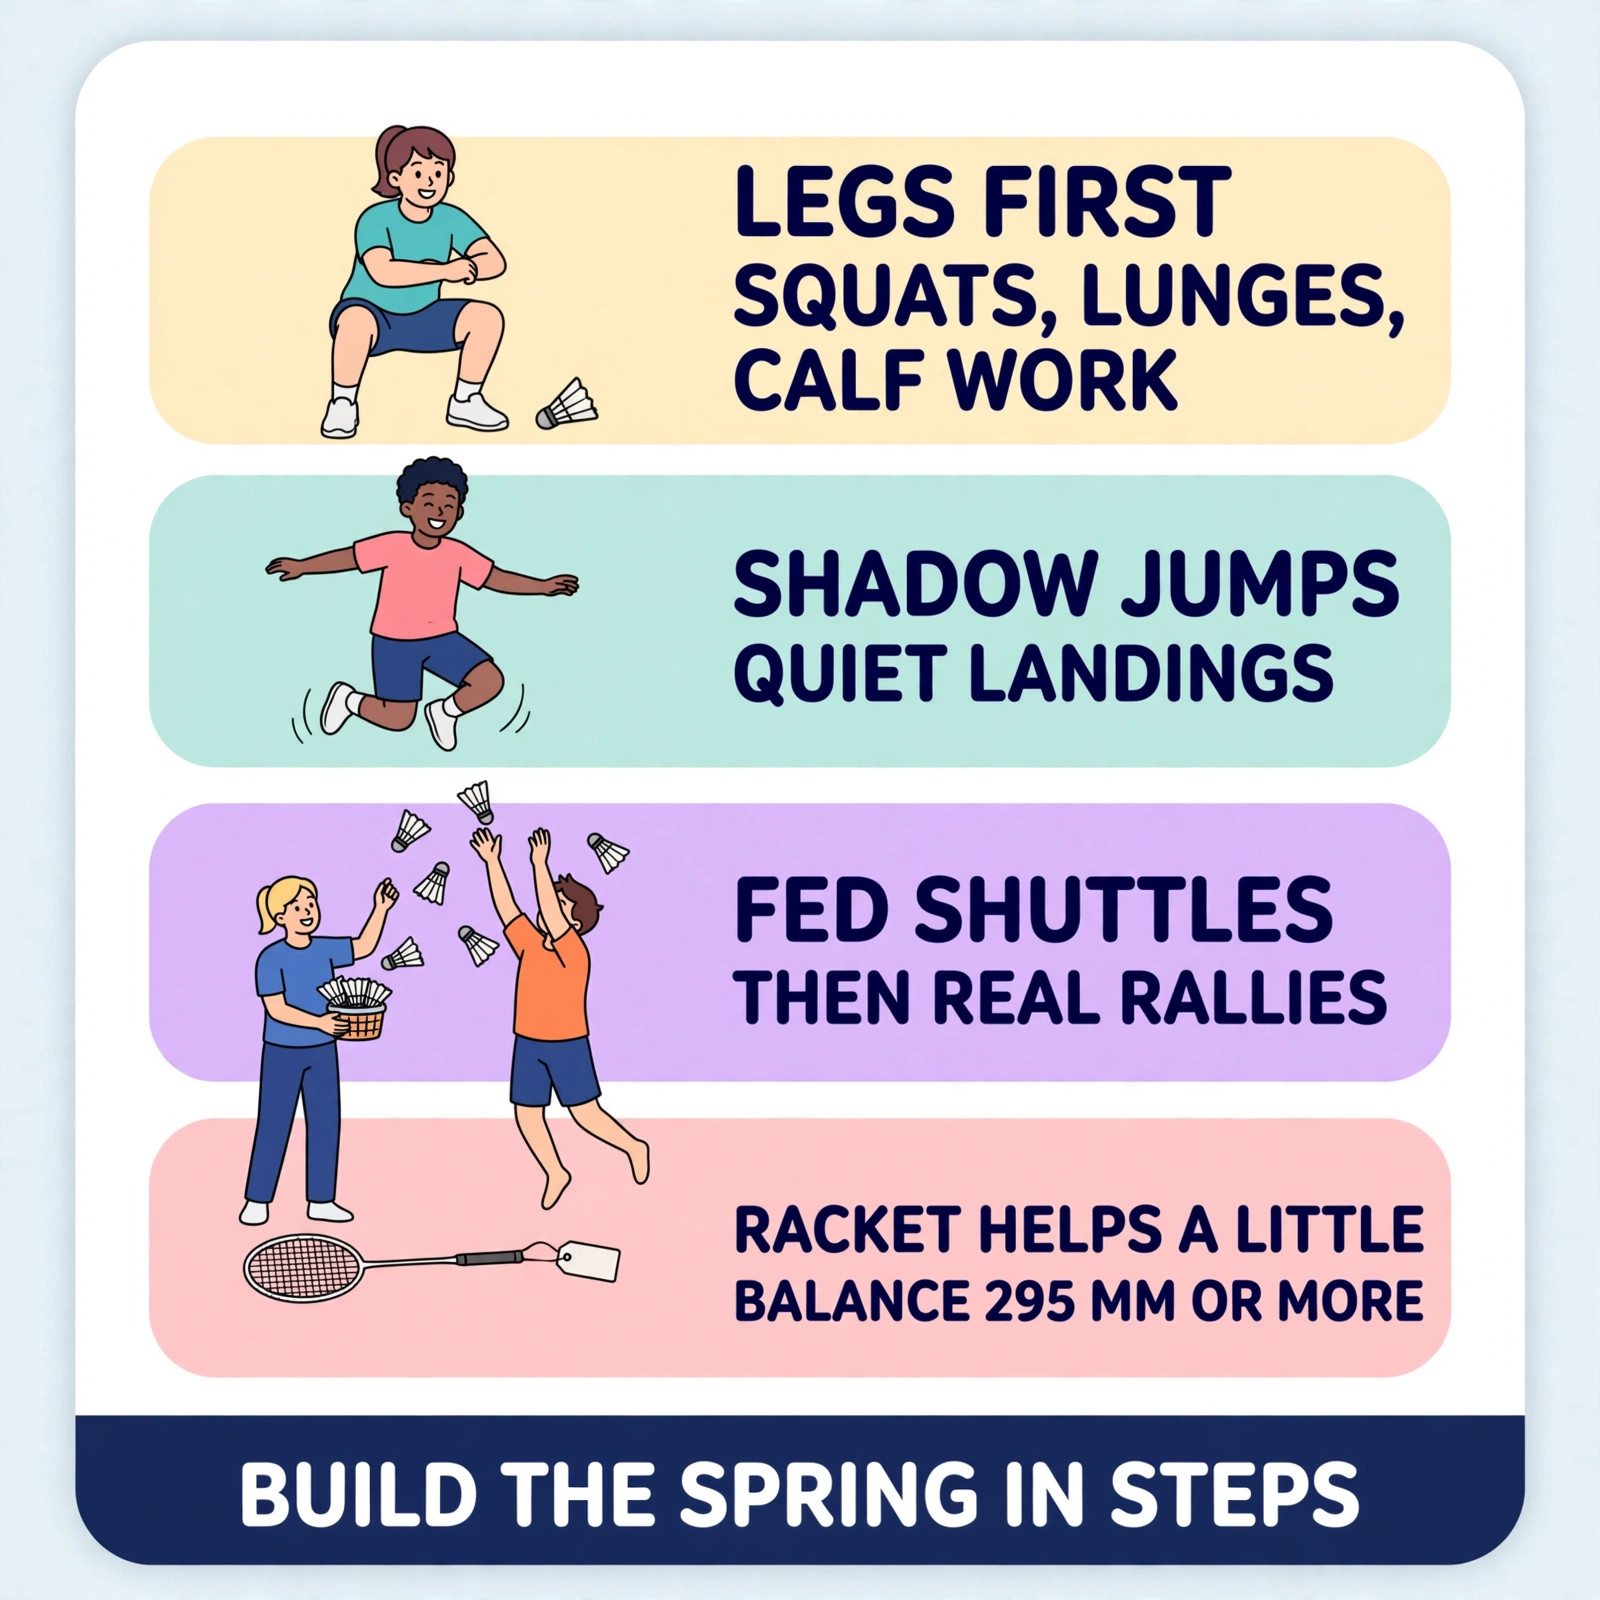
The jump is trained off court before it is trained on it. Leg strength comes first: squats, lunges and calf work, done with clean form, give you the spring and the landing strength at the same time. Then come low, controlled jumps: small hops with quiet landings, then higher jumps with a stuck landing, holding your balance for two seconds before you move. Only when the landing is silent and steady does the jump belong in a rally. Strength built this way does not just add height. It protects the joints that have to catch you, hundreds of times a season.
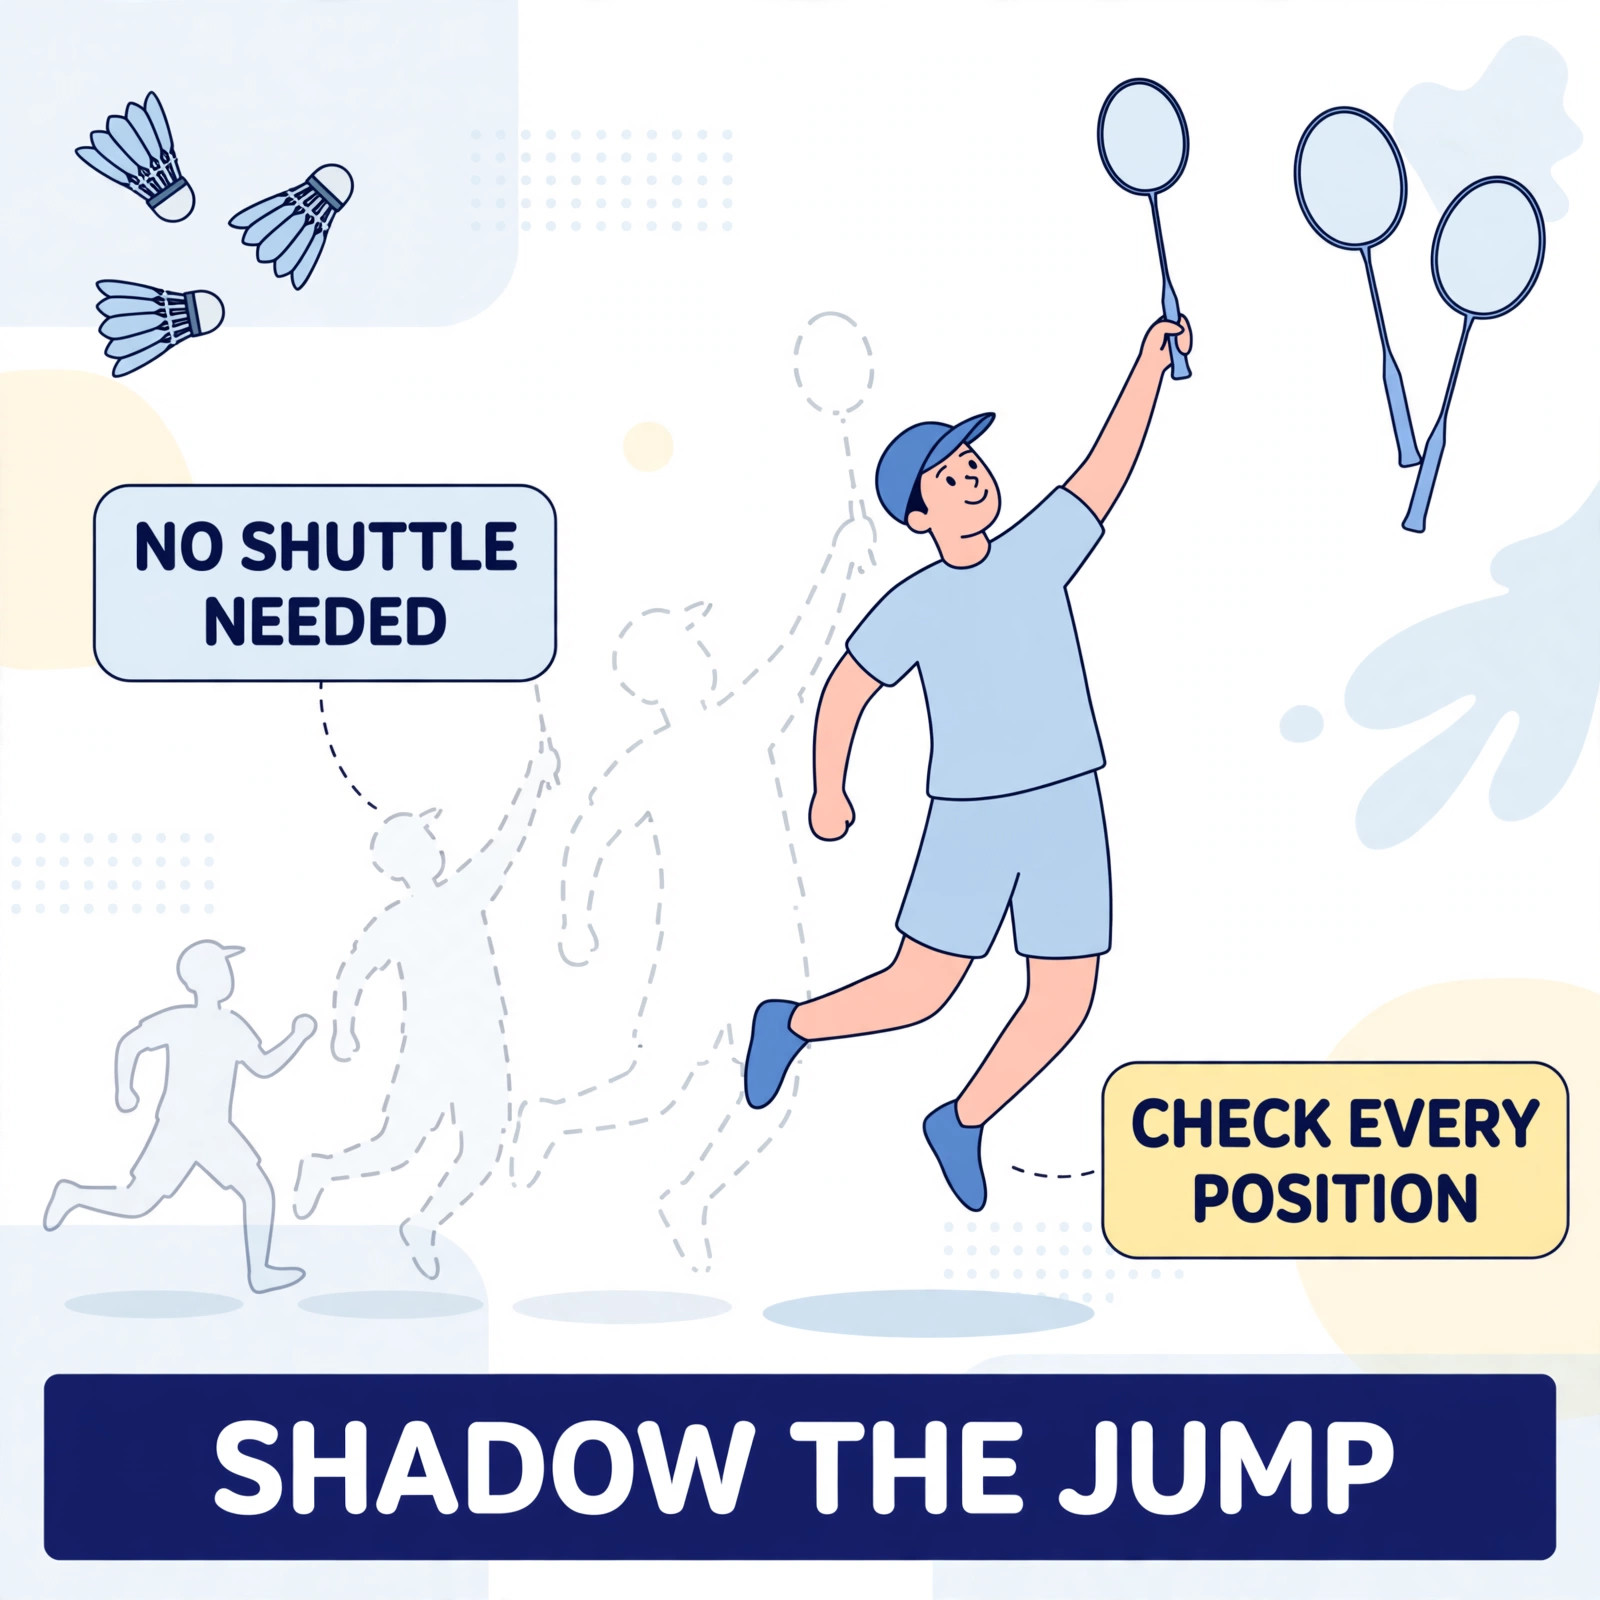
On court, the build has three steps. Step one is the shadow jump smash: the full approach, jump, scissor and landing with no shuttle, slow enough to check every position. Step two is fed shuttles from a coach, high and kind, so the timing can be grooved at a pace you control, with the recovery to base after every single rep. Step three is the real rally, where the jump smash is a choice among shots and you learn to pick its moment. Skip a step and the fault hides until match speed finds it, usually at 18 all.
Your racket helps less than your legs do, but it should not fight you. A head heavy racket, with the balance point around 295 millimetres or higher, carries more momentum through the swing and suits a smashing game. Weights are marked in U: 3U is 85 to 89 grams, 4U is 80 to 84 grams, and the lighter racket is the honest choice while your timing is still being built, because a heavy racket swung late punishes the shoulder and the contact point. Settle the approach, the jump and the landing first. The shot is timing wearing a racket, not the other way round.
Myth vs Reality
Myths About the Jump Smash
Myth: “The higher you jump, the better the smash.” Reality: contact point and timing beat raw height. A small, well timed jump meets the shuttle at its peak with your body turning through it. A huge jump taken late meets it on the way down, off balance. Coaches measure the contact, not the airtime.
Myth: “A jump smash should be hit every time the shuttle is high.” Reality: the shot commits your whole body, and a good defender wants you jumping at shuttles that were never yours. Myth: “It is all wrist.” Reality: the wrist and fingers finish the shot, but the power is built by the legs, the turn and the forearm. A wrist alone cannot carry a body off the floor.
Myth: “Copy the pros frame by frame and you will get their jump smash.” Reality: professionals built the same chain in steps over years: standing smash, approach, small jump, full jump, each layer grooved before the next was added. Myth: “Landing is just how the shot ends.” Reality: the landing is half the technique. It decides your next shot and how long your knees enjoy this sport.

Why Choose Us
Jump Smash Coaching, Built in Safe Steps
At ST Badminton Academy KL, the jump smash is coached inside small group classes capped at max 4 students. Four students means the coach sees the parts of the shot that hide at full speed: the arrival that is a half step late, the contact creeping behind the head, the landing that lands loud. We build the shot in the steps on this page, approach, shadow, fed shuttles, then rallies, so your jump smash is grooved before it is ever asked to win a match point.
Mr Eric Chuar has over 15 years of coaching experience in Singapore and Malaysia. His rule for the jump smash is plain: timing before height, landing before power. He grooved his own players through the standing chain first, added the jump only when the approach was early and the landing was quiet, and treats a noisy landing as a stop sign, not a detail. Big shots, in his classes, are built boring, then they look spectacular.
Our academy is based in Setapak, Kuala Lumpur, convenient for players from Wangsa Maju, Melati Utama, Danau Kota and Gombak. If your jump smash flies long, lands you in trouble, or only works in practice, bring it to a session. We will look at your approach and your landing before we ever ask you to jump higher.
FAQs: Badminton Jump Smash in Malaysia (KL)
These are the questions players ask us most about the jump smash in Malaysia. If your question is not here, message us, describe where your jump smash breaks down, the approach, the contact or the landing, and we will give you a straight answer about which step to rebuild first.
How can I learn the jump smash safely if I live in Setapak or Gombak?
In steps, and with your landing checked from the first session. In our Setapak classes, inside small groups of max 4 students, you groove the approach and the shadow jump before a shuttle is ever fed, so height is only ever added to a movement that is already balanced, timed and safe to repeat.
What matters most in a jump smash, power or timing, in KL?
Timing, by a wide margin. Power matters, but a powerful swing at a falling shuttle produces a flat, late smash, while a timed contact at the top of the jump produces the steep angle that wins the point. In training we groove the approach and the take-off first, and let power arrive as the chain speeds up.
How high do I need to jump to play an effective jump level?
Not high at all, at first. A jump of a few centimetres, timed so you meet the shuttle at the top of it, already changes the angle and your confidence. Height grows later, from leg strength and hundreds of grooved take-offs. Chasing height before timing is how players end up jumping beautifully at shuttles that have already dropped.
My jump smash keeps going into the net or long. What am I doing wrong?
Usually the contact, and it is good news, because contact can be checked. Into the net often means the shuttle was taken too low or too far in front. Long often means it was behind you, struck with an open face while falling. We film one set of fed jump smashes in class and read the contact frame by frame.
What racket setup helps a jump smash without hurting my timing?
A setup you can swing on time. Head heavy rackets, balance around 295 millimetres or more, add momentum for experienced smashers, but weight is a timing cost: a 4U racket at 80 to 84 grams is the honest starting point for most players. In class we test your contact with your current racket before anyone talks about changing it.
Do you coach the jump smash in classes near Wangsa Maju?
Yes. The jump smash is coached as part of regular group classes at our Setapak base, a short trip from Wangsa Maju. The build runs inside normal sessions, in small groups of max 4 students: standing chain, approach, shadow jumps, fed shuttles, then rallies, with your landing and recovery checked at every step.
How long does it take to learn a reliable jump smash in Malaysia?
Long enough to groove four habits: arriving early, taking off on time, contacting at the top, and landing ready. Players who train the steps twice a week usually own a reliable jump smash inside a season of steady work. The moment picking takes longest, because it only grows in real rallies against real defenders.
Where is ST Badminton Academy KL located for jump smash training?
We are based in Setapak, Kuala Lumpur, close to Wangsa Maju, Melati Utama, Danau Kota and Gombak. Sessions run in small groups of max 4 students. Message us for the current class schedule and we will place you in a group at your level, with jump smash work built into the training plan.
What makes Mr Eric Chuar a suitable coach for jump smash badminton?
Fifteen years of coaching in Singapore and Malaysia, and a simple order of work: timing before height, landing before power. Eric reads a jump smash from the feet up, approach, take-off, contact, landing, and corrects the first fault in that order, inside small groups where every landing is actually seen.
Badminton Jump Smash in Action

What It Takes to Own the Air
A player meets our jump smash standard when five habits hold: the approach arrives behind the shuttle early, the take-off is timed so contact happens at the top of the jump, the scissor turns the body through the shot, the landing is quiet and balanced on both feet, and the first step after landing goes back to base. When those five hold, the shot is a weapon instead of a gamble.
| Factor | Wild Jump | Timed Jump JUMP |
|---|---|---|
| Frequency | 1 or 2 times a week. Mostly for fun and sweat. | Before the rally, the player is set behind the shuttle with the approach grooved: early feet, side on, non-racket arm up, eyes on the shuttle. |
| Drills Focus | Basic static feeding. Minimal footwork pressure. | During the jump, timing does the work: take off under the shuttle, contact at the very top, body turning through the shot as the legs scissor. |
| Physical Conditioning | Rarely included. Just playing games on court. | Core, agility, and speed training included in every session to prevent injury and build stamina. |
| Tactical Awareness | "Just hit it over." No real game plan. | Video analysis, point construction, and learning to read the opponent's game. |
| Coach Ratio | Large groups (8-10 kids). Coach barely watches you. | Max 4 students. Mr Eric Chuar personally corrects every stroke and movement detail. |
| Goal Setting | Fun and exercise. | On landing, both feet land soft and the first step is already back to base, so the smash starts the next phase of the rally instead of ending your part in it. |
| Long Term Result | Good recreational player. | A steep, fast smash your opponent reads late, followed by a player who is balanced and ready for whatever comes back. |
Badminton Jump Smash Training in Kuala Lumpur
This page covered the jump smash from the floor up: why the angle and the timing win points, the approach and the two foot take-off, contact at the very top, the scissor turn, the landing and the recovery, and how leg strength, shadow work and fed shuttles build the shot safely. Bring your jump smash to Setapak and let us build yours in steps.